The Rapid Elearning Blog

Archive for the ‘Uncategorized’ Category


Articulate Rapid E-Learning Blog - ebola training ideas

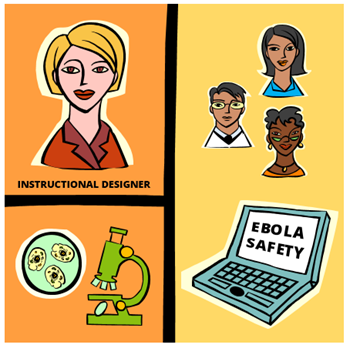
Sometimes the world seems a bit scary as things spiral out of our control. This is definitely the case with the news regarding Ebola. However, just because we’re not doctors and nurses doesn’t mean we can’t use our skills to help in the fight against Ebola.

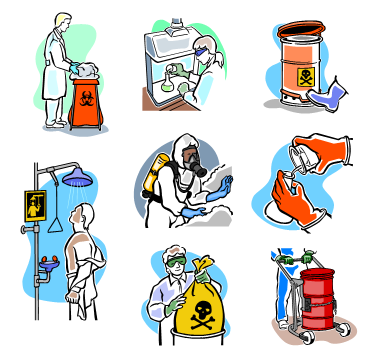
Examples of Ebola Training

The elearning community’s weekly challenges are designed to be quick ways to build prototypes and practice new skills. Some people put in a lot of work and some build simple projects. The main point is to try something to new.

However, last week’s challenge was a bit different because it tapped into a current crisis. The goal was to build Ebola training based on some publicly available resources. You can see three of the examples below and the rest are in this recap post.

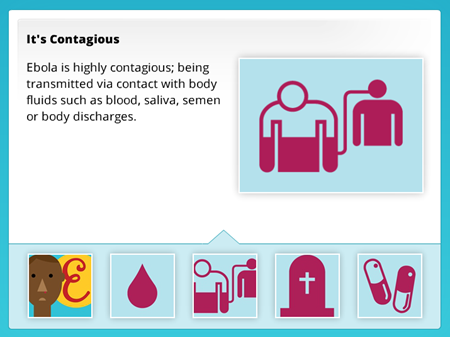
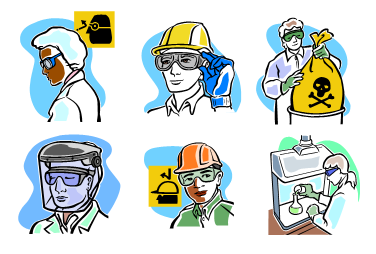
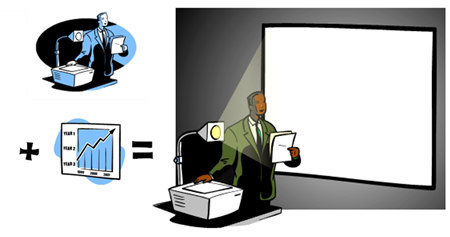
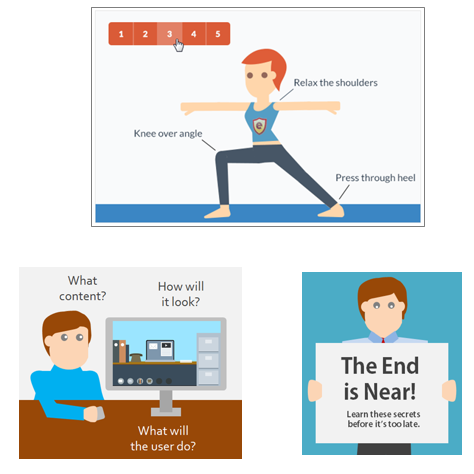
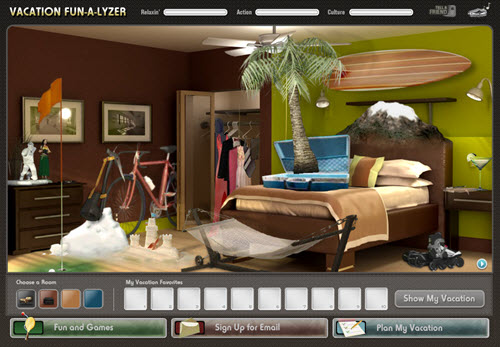
Ebola Training Example #1

The first demo was created by Jeff Kortenbosch of Serious Learning. He based it on an infographic and it’s created in PowerPoint.

Articulate Rapid E-Learning Blog - ebola training example 1

Click here to view the elearning example.

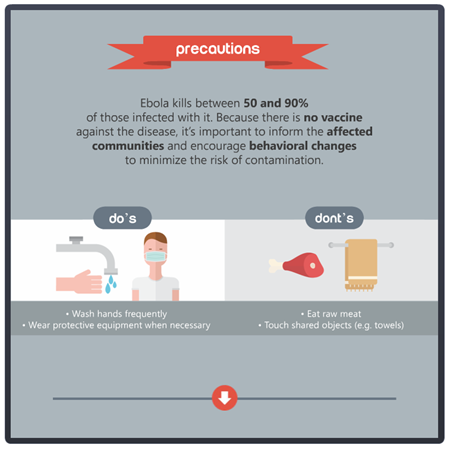
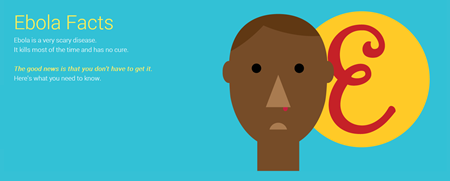
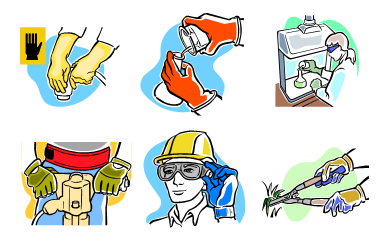
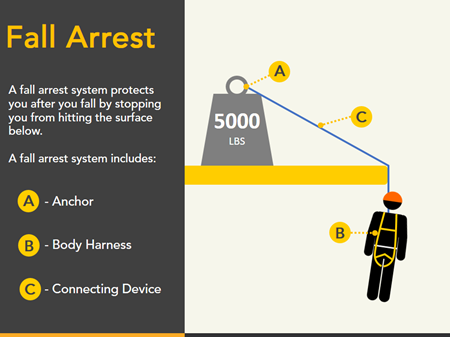
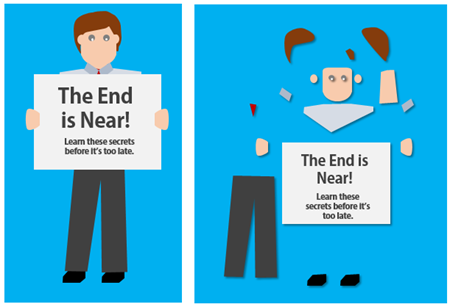
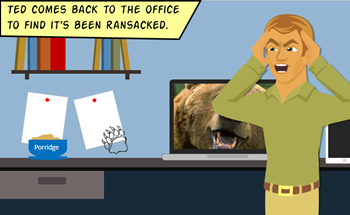
Ebola Training Example #2

This demo was created by Jackie Van Nice who always shares how she creates her demos.

Articulate Rapid E-Learning Blog - ebola training example 2

Click here to view the elearning example.

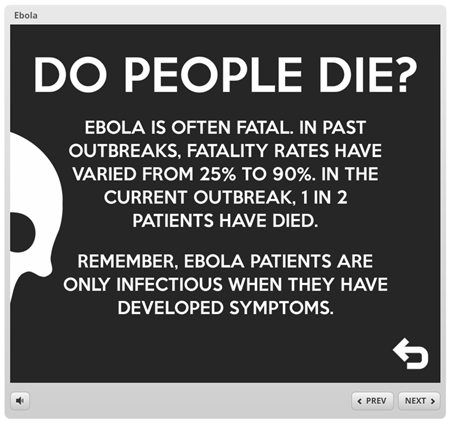
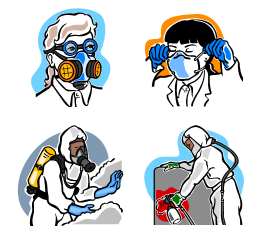
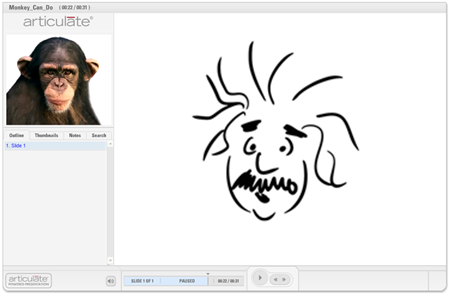
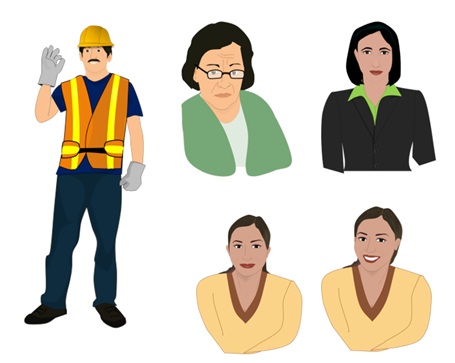
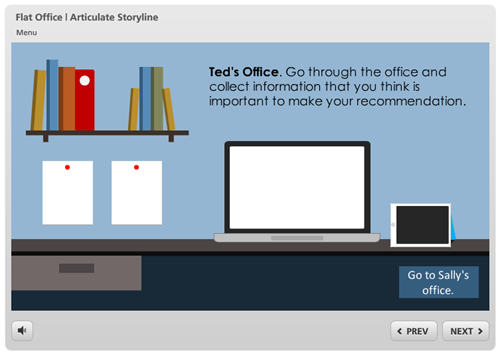
Ebola Training Example #3

The next demo was created by Kristin Anthony, instructional designer, lifter and lover of dogs.

Articulate Rapid E-Learning Blog - ebola training example 3

Click here to view the demo.

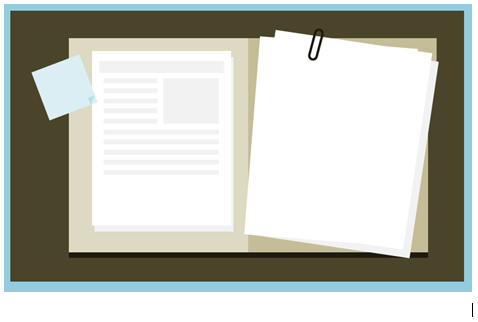
Rapid E-Learning for a Rapid Response

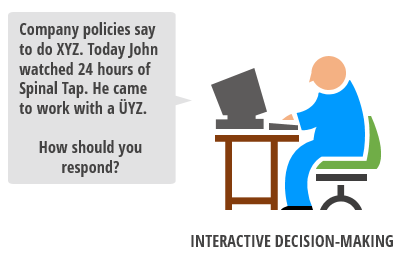
During a crisis getting people up and running quickly is super important, especially since many are volunteers and require orientation. There’s not a lot of time to pull together resources and build training that can be delivered to a lot of people quickly. That’s where rapid authoring tools really show their value. Something simple like a form-based process interaction can be built in minutes and can be media rich using up-to-date images and video from the field.

Articulate Rapid E-Learning Blog - ebola training example rapid response

Click here to view the demo.

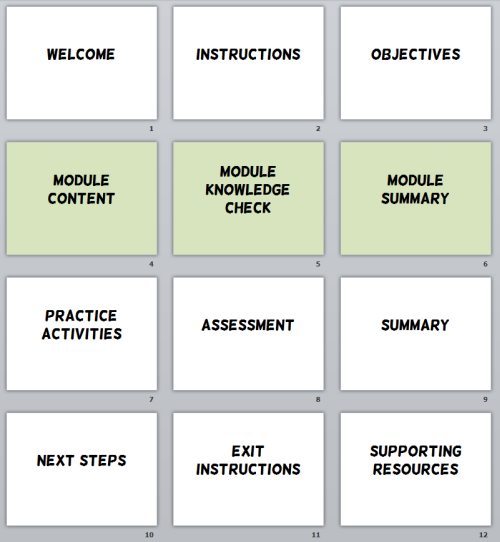
I created this demo in a just a few minutes. It’s simple but lets me share the information quickly and it can be delivered to mobile devices. If the field staff had videos and images required for training it wouldn’t take much to add them. Just about anyone could build something like this because the form-based structure means there is absolutely no programming required. That’s something that couldn’t have been done a few years ago.

I recall during the Haiti earthquake a few years ago, some of the elearning course volunteers at LINGOs had to create content on the fly to help some of the relief efforts. It was pretty impressive.

Your Role in a Rapid Response World

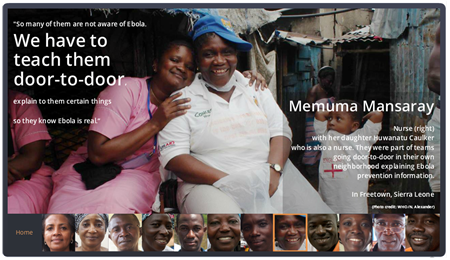
Here are a few ways that you can use your skills to help out in a time of need. Currently Ebola’s got all of the press, so if you want to volunteer to help with anything Ebola related Ebola Facts is a good place to start.

Articulate Rapid E-Learning Blog - ebola training volunteer ebola facts

While Ebola is making the news there are all sorts of other diseases wreaking havoc. For example based on the World Health Organization, in 2012 malaria killed about 600,000 and tuberculosis killed well over 1 million. As you can see, there’s a lot of going on and many ways to support those tasked with stemming the tide.

In addition, not all humanitarian needs are related to medical crisis. If you want to volunteer to help in other capacities here are two good organizations that could use your course authoring skills.

Articulate Rapid E-Learning Blog - ebola training volunteer lingos

We’ve featured LINGOs before and many of you have taken on the challenge of supporting their mission to provide world-class learning opportunities.

You can volunteer with their Last Mile Learning Initiative or many of their member agencies such as CARE, Habitat for Humanity, International Rescue Committee, Save the Children, as well as any other non-profit agency with a primary focus to improve people’s lives in the developing world.

They also have a yearly Global Giveback competition where your work can be recognized for its success.

Articulate Rapid E-Learning Blog - ebola traininig volunteer disasterready.org

Another organization looking for volunteers is DisasterReady.org. They focus on getting aid workers ready for work and they make all of the courses available for free. The good thing for you is that they’re actively looking for volunteers. You can read their blog here and click this link to learn about how to volunteer.

Why Should You Help?

The main reason to help is because it’s a good thing. Our time here is precious and best served helping others. While we may not be medical or emergency staff who can work on the frontline, we do have skills and experiences that are valuable.

Another benefit is b
uilding your professional network and working on highly visible projects that you can add to your portfolio. It’s a win-win!

Events

Free E-Learning Resources

Want to learn more? Check out these articles and free resources in the community.

Here’s a great job board for e-learning, instructional design, and training jobs

Participate in the weekly e-learning challenges to sharpen your skills

Get your free PowerPoint templates and free graphics & stock images.

Lots of cool e-learning examples to check out and find inspiration.

Getting Started? This e-learning 101 series and the free e-books will help.


Articulate Rapid E-Learning Blog - Tips to create interactive elearning

How do you define interactive elearning?

It’s a question I ask clients when they tell me they want an interactive elearning course. Usually they define interactive elearning with what we normally consider the “bells and whistles.” Often they mention things like fancy buttons that change colors and rollover effects.

Sometimes we laugh those off as superfluous or unnecessary interactions. But they do play an important role in interactive elearning. But they’re only part of the interactive elearning process.

Step 1: Interactive E-Learning Requires Onscreen Actions

One goal of interactive elearning is to craft an immersive experience. The course’s visual design needs to be contextual. It’s something we’ve reviewed before. For example, if you’re doing a course on operating room technology, you want to bring the learner into the operating room. You can do part of this by tapping into your visual voice and crafting a visually immersive screen.

Another way to create an immersive experience is to have the users interact with onscreen elements or “touch the screen.” We discussed this earlier in a blog post on how to touch the screen.

Articulate Rapid E-Learning Blog - three types of onscreen interactions for interactive elearning

Touching the screen is key. It’s also NOT an either/or option. Regardless of how you design your course’s interactions, the learner is going to interact with it. You’ll either offer options to click, hover, or drag. And since that’s the case, you need to make sure that those onscreen interactions contribute to a high value, interactive experience that pulls the learner into the course.

Step 2: Interactive E-Learning Requires In-brain Actions

Interacting with onscreen elements is an important part of elearning course design. However, the ultimate goal of your course is to meet specific learning objectives. So in that sense, I define interactive elearning as getting the learner to interact with the content. This is more than visual and tactile interactions. It includes them processing what they learn and demonstrating understanding.

Articulate Rapid E-Learning Blog - make decisions for interactive elearning

Here are a few keys to crafting the right interactive experience:

  • Develop clear learning objectives. Why are they taking the course and what do you expect of them when they’re done? Here’s a good starting point to learn more about creating good learning objectives.
  • Have the learners prove their understanding. With clear objectives you can develop a means for the learner to demonstrate what they’ve learned and their current level of understanding. This is more than a simple multiple choice quiz. Instead it’s the course’s activities and decision-making scenarios that prove what they know.
  • Place their learning in a relevant context. Many elearning courses rely too much on information and not enough on performance. One way to avoid this trap is to frame the content in a context that is real to the learners. And then present the learning experience in a way that mirrors the way they work and the types of decisions they need to make. Here’s a post on how to switch from information to performance-based learning.

Interactive elearning engages the learner. You can engage their senses to craft an immersive experience—make it look great and provide lots of onscreen interactivity. But you can’t stop there. You also need to get them to process the information. Place them in a relevant context and get them to make the types of decisions they’d make in real life.

Combine “touch the screen” interactivity with great decision-making and you’re on your way to building great elearning courses. What do you think?

Events

Free E-Learning Resources

Want to learn more? Check out these articles and free resources in the community.

Here’s a great job board for e-learning, instructional design, and training jobs

Participate in the weekly e-learning challenges to sharpen your skills

Get your free PowerPoint templates and free graphics & stock images.

Lots of cool e-learning examples to check out and find inspiration.

Getting Started? This e-learning 101 series and the free e-books will help.


Articulate Rapid E-Learning Blog - safety training images

I was building a demo for a workshop and needed a few safety training images. Fortunately Microsoft has some decent images available on their site.

  • Click here to get an image search box. Ignore the “no results” message.
  • Search for “Style 401”
  • Microsoft’s Services Agreement: I get a lot of questions about whether or not you can use the images. Check out their service agreement to learn more. Section 8.1 discusses use of the media elements.

Here’s the safety training demo I created for the workshop. It’s for a session on how to use the slider feature in Storyline 2.

Articulate Rapid E-Learning Blog - safety training course example

Click here to view the elearning example.

Below are some of the images from Style 401. I sorted them into general groups to make it easier to see how they could be used. Some of the images are in multiple groups if they feature different safety equipment or procedures.

Safety Training Equipment Images

Head Protection

Articulate Rapid E-Learning Blog - safety training head

Eye Protection

Articulate Rapid E-Learning Blog - safety training eyes

Hand Protection

Articulate Rapid E-Learning Blog - safety training hands

Respiratory Protection

Articulate Rapid E-Learning Blog - safety training breathing respiratory

Foot Protection

Articulate Rapid E-Learning Blog - safety training foot

Hearing Protection

Articulate Rapid E-Learning Blog - safety training hearing

Safety Attire

Articulate Rapid E-Learning Blog - safety training outfits

Safety Training Procedures & Use Cases

Safety Procedures

Articulate Rapid E-Learning Blog - safety training procedures

Lifting Safely

Articulate Rapid E-Learning Blog - safety training lifting

Handling Hazardous Material

Articulate Rapid E-Learning Blog - safety training hazardous material

I was pleasantly surprised to find an entire clip art style dedicated to safety training. There’s a lot from which to choose and should help when you need to build your own safety training. If you use this style to build something, please share it with the rest of us so we can see what you did.

Events

Free E-Learning Resources

Want to learn more? Check out these articles and free resources in the community.

Here’s a great job board for e-learning, instructional design, and training jobs

Participate in the weekly e-learning challenges to sharpen your skills

Get your free PowerPoint templates and free graphics & stock images.

Lots of cool e-learning examples to check out and find inspiration.

Getting Started? This e-learning 101 series and the free e-books will help.


Articulate Rapid E-Learning Blog - how to create characters

In this post we’ll review seven ways to create characters for your online training courses. For the most part these characters can be created in PowerPoint so you don’t need other tools.

Create Characters by Customizing Clip Art

If all you have is clip art then that’s what you have to work with. But you still have some flexibility. Start by selecting the clip art image, ungrouping it, and making the customizations you need. Then regroup it. I also like to save the new image as a .png.

Articulate Rapid E-Learning Blog - how to create characters using PowerPoint clip art

Here are some posts that should help you do this:

With some creativity you can do quite a bit. I try to stick with the same image style and remove all of the background items that make clip art look like clip art.

Create Characters by Pulling Them Out of Stock Images

You can find a lot of stock images for free. However, it’s not always easy to find people who are isolated. But that’s easy enough to do yourself. I look for images with people that I can pull out of the image. PowerPoint 2010+ has a remove background feature that works well in most cases.

Articulate Rapid E-Learning Blog - how to create characters using sotck images

Once you’ve isolated the people you can put them over any background or even create silhouettes.

Create Characters by Using Simple Shapes

Pictograph images are common for signs and work well with a lot of procedural and safety training.

Articulate Rapid E-Learning Blog - how to create characters using shapes and pictograms

Create Characters by Sketching Them

I used to do a lot more sketching of images back when I had one of the old tablet PCs. It’s easy enough to do.

Articulate Rapid E-Learning Blog - how to create characters using sketches

At a recent conference Blair Rorani live tweeted my session and created some cool images. I tried it myself at the workshop in Denver, which you can see below.

Articulate Rapid E-Learning Blog - how to create characters using sketches and iPad

Sketching doesn’t need to be perfect and the organic nature of it provides a novel contrast to what we usually see in our elearning courses.

Create Characters by Using a Flat Design

In a recent post I needed some characters that matched the characters David used in his blog post on a weekly challenge. Since it was a flat character it was easy enough to create using PowerPoint.

Articulate Rapid E-Learning Blog - how to create characters using flat characters

As you can see in the image below, the character is a bunch of shapes combined to look like a person, probably a lot like how we were created.

Articulate Rapid E-Learning Blog - how to create characters using flat characters in PowerPoint

Create Characters Using Illustrations in PowerPoint

This last technique takes a little practice but offers the most flexibility because you can virtually trace any image you need.

Articulate Rapid E-Learning Blog - how to create characters using illustrated characters created in PowerPoint


Those who know Inkscape or Illustrator can use those tools to create vector files. But the images above were created in PowerPoint. Once you get a hang of it, creating the images is generally easy.

At least try to create one image and see how it works. I took a stab at creating a self-portrait (and then I squished it a little at the sides to lose a few pounds).

Create Characters by Customizing the Articulate Characters

Many of you use the Articulate software. The illustrated characters, just like clip art, can be ungrouped and customized. That means you can change the facial features or modify the outfits, which comes in handy if you have specific work uniforms.

If you use Studio ‘13, insert a character and ungroup it. Then make whatever changes you want. In Storyline, insert a character on the slide and then save as an image. Use the .emf or .wmf format. This keeps them as vect
or images that can be ungrouped. Then bring the image into PowerPoint and ungroup it to make modifications. Save the modified image and insert on your Storyline slide.

Articulate Rapid E-Learning Blog - how to create characters customize Articulate characters

Above is an example of a character I modified. I changed the facial features a bit, made her head smaller to look less cartoonish, and put her in a work outfit. I used the Best Buy look to show some branded work attire.

And here’s another example where I combined the characters with some assets from other clip art. I ungrouped the clip art character to use the hard hat and utility belt.

Articulate Rapid E-Learning Blog - how to create characters customizing Articulate characters and using clip art

In an ideal world you have access to a graphics person or a budget to buy the characters you need. But that’s not the case for many of you. These tips above should help you get started and give you enough options to create the characters you need.

Events

Free E-Learning Resources

Want to learn more? Check out these articles and free resources in the community.

Here’s a great job board for e-learning, instructional design, and training jobs

Participate in the weekly e-learning challenges to sharpen your skills

Get your free PowerPoint templates and free graphics & stock images.

Lots of cool e-learning examples to check out and find inspiration.

Getting Started? This e-learning 101 series and the free e-books will help.


Articulate Rapid E-Learning Blog - time saving tip - build courses slides templates

At a recent workshop I was chatting with someone about simple ways to speed up course design. Here are a few of the time saving tips we discussed.

8 Time Saving Tips: Build Template Slides

Start by thinking through the various screens common to elearning courses and then build the core structure. Don’t worry about the way they look because that will change based on the course topic. However the core features and functionality can be established upfront and then saved as a template slide.

Here are a few of the screens common to most courses:

  • Course Navigation: It’s common to have some course navigation guides as part of the course. And there are many ways to do it, some covered in this post on course navigation. Create a template and structure for navigation that you can quickly add to your course.
  • Test Media Screen: This screen includes information on types of media, plugging in audio, and testing volume. Do this before they get to a slide with media that may be turned up to loud.
  • Getting Started Screen: This screen explains details of the course, title, abstract, how long it will take, etc. Create an instruction screen with all of those details. Again, don’t worry about the way it looks. You can move the objects around and style them to meet your course design.
  • Section Title Screen: All courses have a title screen. Many courses also have sections that require section title screens. How will those look different? What content generally goes there? Create a few variations of the section title screens so you have them on hand when you need them.
  • Gate Screens: A gate screen serves multiple purposes. It stops the learner and orients them to something new. Some people use it prior to an interaction, others use it move persistent instructions to a single screen. You could even use it as a section title screen. Here’s a post on how to build gate screens.
  • Resources Screen: After the course there may be all sorts of resources for the person to use. Some software comes with a resources tab, but you are usually limited to a title and link to the resource. If you want to add more, you’ll need a page. Like the other options, come up with a structure and determine the type of content. Perhaps it includes a table-like look with thumbnail image, title, and link.
  • Final Instructions: What’s the next step when the person’s done with the course? Are there practice activities? Do they connect with a peer coach? Are they required to demonstrate something in the real world?
  • Exit: When everything’s complete and the person’s ready to exit, what are they to do? If you don’t provide instructions you may come in on Monday to find that they sat at their desks the entire weekend waiting for exit instructions. Don’t risk upsetting their work life balance. Create a default exit screen you can plug into the backend of the course.

Bonus Time Saving Tip: Create a Course Starter Template

Build an elearning starter course template. There are a few core slides that are in most courses.  For example, two are the navigation instructions and the final slide that tells the learners they’re finished and free to leave.  Build those into a template and start all of your courses with those slides ready to go. And add in some of the ones we discussed above.

Articulate Rapid E-Learning Blog - time saving tip use a template starter kit

Here’s a post where I detailed the elearning starter kit.

The key point in all of this is that there are slides common to most courses. And most of the slides have the same type of content. Save time by creating those slides and adding placeholders for the content. Then the next time you start on a course you can add those pre-built slides.

Is something missing?  Which screens would you pre-build and include in the list?  Feel free to share your ideas by clicking on the comments link.

Events

Free E-Learning Resources

Want to learn more? Check out these articles and free resources in the community.

Here’s a great job board for e-learning, instructional design, and training jobs

Participate in the weekly e-learning challenges to sharpen your skills

Get your free PowerPoint templates and free graphics & stock images.

Lots of cool e-learning examples to check out and find inspiration.

Getting Started? This e-learning 101 series and the free e-books will help.


Articulate Rapid E-Learning Blog - first step when building interactive elearning courses

On past projects, many of my customers would ask for interactive elearning courses. When I asked them how they defined interactive elearning courses they’d usually list things like fancy mouseovers, drag-and-drop interactions, and a host of other ways to interact with the screen. They rarely described making decisions or using the content.

Many times we dismiss this type of interactivity as novel and superfluous. I’ve heard other presenters deride those things as a waste of time and not being much more than lipstick on a pig.

Hey, there’s nothing wrong with a good looking pig. What’s the alternative?

Seriously, I can understand their perspective but I don’t agree with their derision. In fact, that type of interactivity is an important part of building effective and interactive elearning courses.

Interactive E-Learning Courses: Create an Immersive Experience

A key component while building interactive elearning courses is to craft an immersive experience. You start by creating a visually engaging context. If I’m teaching you about the Hoh Rain Forest, I want to bring you INTO the Hoh Rain Forest.

Articulate Rapid E-Learning Blog - before adn after example of visually immersive interactive elearning courses


We discussed that a bit when we looked at how to tap into your visual voice and planning your visual design. Learn to create a visually engaging and immersive look.

Interactive E-Learning Courses: Touch the Screen

The next step is getting the learners to touch the screen. A visually immersive course pulls them in a little. Touching the screen pulls them in a lot more. The reason is because you are engaging their senses and having them actively involved with the course.

Articulate Rapid E-Learning Blog - three ways to touch the screen when building interactive elearning courses.

A lot of people deride onscreen interactions like dragging and clicking as novel and perhaps even distracting. However, it’s a key part of interactive elearning. A goal is to get the learners to interact with the screen. At this point, it’s not about the cognitive processing. Instead, it’s all about pulling them in. And a great way to do so, is by getting them to do something on the screen.

In a previous post we discussed the building blocks of interactivity and identified three key ways to “touch the screen.” They are clicking, mouseovers, and dragging. Here’s a simple example of the three types applied to the same interaction.

Articulate Rapid E-Learning Blog - examples of interactive elearning courses

  • Click version of the office selection scene.
  • Hover version of the office selection scene.
  • Drag version of the office selection scene.

As you can see in the demos above, the types of interactions are somewhat interchangeable. Some make more sense than others depending on the context. However, the main point is to figure out how you’ll get your learners to touch the screen. How can you get them to interact with the screen elements? The more you can do this, the more you keep them engaged as they go through the course.

Here’s a cool example I like to show at workshops. It’s an interaction from a travel website and not an elearning course. However, imagine if this site wasn’t interactive. The travel agency could have met its goal with a list of travel choices from which to choose and then compile recommendations for you.

Articulate Rapid E-Learning Blog - travel site that is similar to many interactive elearning courses

Click here to view the interactive web site.

But they decided against that. Instead they get you to explore the site and “touch the screen” in various ways. There are places to click, mouseover, and drag. It’s fun and engaging, and definitely a lot more memorable than a dropdown list. And it helps the agency meet their objective of getting you to select a vacation.

Those who deride the superfluous interactions are correct if all you do is add novelty to your course. The interactions get old fast. And while visual design and onscreen interactivity plays a role in engaging the learners, it’s not the main way to engage the learners. All of those things need to be in concert with a great learning experience and coupled with the course’s content and learning objectives.

However, if you neglect crafting an immersive experience you miss the opportunity to really engage your learners and building effective and interactive elearning courses.

What are some ways you’ve used onscreen interactions to immerse learners in your elearning courses?

Events

Free E-Learning Resources

Want to learn more? Check out these articles and free resources in the community.

Here’s a great job board for e-learning, instructional design, and training jobs

Participate in the weekly e-learning challenges to sharpen your skills

Get your free PowerPoint templates and free graphics & stock images.

Lots of cool e-learning examples to check out and find inspiration.

Getting Started? This e-learning 101 series and the free e-books will help.


Articulate Rapid E-Learning Blog - free flat UI learning interaction template

Here’s a template I created for a recent workshop on how to create an exploratory learning interaction. I used a flat UI design for the learning interaction. Since it uses a similar style to this previous template, the two learning interactions can be combined. That’s what I did in the demo below.

Example of the Learning Interaction

Here’s an example of the learning interaction combined with the previous template.

Articulate Rapid E-Learning Blog - example of the free flat UI learning interaction template

Click here to view the learning interaction.

Learning Interaction Downloads

Here are some downloads of the learning interaction:

Feel free to use the template as you like. Also, you can combine them with these other free templates which also have a flat UI design.

Articulate Rapid E-Learning Blog - another free flat UI learning interaction template

Articulate Rapid E-Learning Blog - yet another free flat UI learning interaction template

Click here to view the previous post and get the free downloads.

The files were used for a practice activity on creating simple exploratory learning interactions. They let the learner collect information. Once they have the information, you could continue the interaction by having them use the information to make a decision.

Events

Free E-Learning Resources

Want to learn more? Check out these articles and free resources in the community.

Here’s a great job board for e-learning, instructional design, and training jobs

Participate in the weekly e-learning challenges to sharpen your skills

Get your free PowerPoint templates and free graphics & stock images.

Lots of cool e-learning examples to check out and find inspiration.

Getting Started? This e-learning 101 series and the free e-books will help.


Articulate Rapid E-Learning Blog - Favorite apps & extensions for chrome

This weekend I reinstalled my operating system. After I installed my Chrome browser I was glad to see that everything sync’d properly, especially some of my favorite browser apps and extensions.

I’ve come to depend on them as I use many online services to help me build elearning courses. I love them because they’re always at my fingertips and save me time.

Here are five of the extensions I use quite regularly.

IE Tabs

If you use PowerPoint, then this is a must-have app. There are some things you can do in Internet Explorer that you can’t in other browsers. The IE Tabs app acts as if you’re in Internet Explorer so it means that you have the same capability.

When I want to add clip art or other graphics from the Microsoft Office Online, I can click and drag it straight to the PowerPoint slide, right from the browser. Without the IE Tabs app, I have to download the files first and then insert them.

Watch the video below and you’ll see what I mean.

Click here to view the video.

Mark As Read

Mark As Read sits in the address bar and looks like a document. With it I can mark articles that I am reading or want to read later. I do have other apps that I use for bookmarking and saving for later, but I use this quite a bit because it’s just so simple.

To me it’s like dog-earing a book versus using some fancy-schmancy bookmark.

Articulate Rapid E-Learning Blog - use this app to read articles on elearning

Search This Current Site

I mentioned this in a previous post so I won’t rehash it much other than to say that this is one of my most used apps. Learn more about Search This Current Site from this post.

Articulate Rapid E-Learning Blog - use this app to search elearning sites and popular blog posts

Black Menu for Google

The Black Menu for Google provides really fast access to some key Google functionality. Once logged into your account, you can quickly access all of your Google content.

I use it mostly for quick access to Google Drive and the translate function.

Articulate Rapid E-Learning Blog - use this app to access Google and elearning content  

QuickDrop Explorer

Like many of you I use Dropbox to store and share a lot of my files. QuickDrop Explorer makes it handy to locate and share files right from the browser. There’s no need to go to your Dropbox folder and dig for files. You can do it all from the browser.

Articulate Rapid E-Learning Blog - use this app to access all of oyur elearning content on Dropbox

These are five of the apps that I use regularly. They save time so I see them as critical productivity tools. Which browser apps do you use?

Events

Free E-Learning Resources

Want to learn more? Check out these articles and free resources in the community.

Here’s a great job board for e-learning, instructional design, and training jobs

Participate in the weekly e-learning challenges to sharpen your skills

Get your free PowerPoint templates and free graphics & stock images.

Lots of cool e-learning examples to check out and find inspiration.

Getting Started? This e-learning 101 series and the free e-books will help.


Articulate Rapid E-Learning  - pet peeves for elearning

Recently there was a great discussion in the elearning community on pet peeves. As you review them, I’m sure you’ll be able to relate to quite a few. Here are a few that stood out to me:

Articulate Rapid E-Learning  - examples of pet peeves for elearning

My E-Learning Pet Peeve

There are a lot of things I’d like to improve with elearning but one of those things that bugs me most is when the client wants to lock the course navigation. And then when I ask why, it’s because they want to make sure that the person is getting all of the information.

Articulate Rapid E-Learning  - my pet peeve for elearning

I addressed this issue in a previous post. Locking online courses so that the learner “gets the information” is ridiculous. The only thing they’re getting is a headache and repetitive stress disorders as they rapidly click on the next button. Of course the case could be made that adding a slow narrator to the locked course helps slow down the rapidly clicking and in turn decreasing repetitive stress injuries.

The only way you know they GET the information is by having them show you how they use it. I prefer some sort of contextual activity where they apply what they’re learning to demonstrate their understanding of what they know.

Of course, some clients will still want to lock the course. That’s OK. Lock it at the decision points and not through the navigation controls.

So that’s my elearning pet peeve. What’s yours? Share it here.

Events

Free E-Learning Resources

Want to learn more? Check out these articles and free resources in the community.

Here’s a great job board for e-learning, instructional design, and training jobs

Participate in the weekly e-learning challenges to sharpen your skills

Get your free PowerPoint templates and free graphics & stock images.

Lots of cool e-learning examples to check out and find inspiration.

Getting Started? This e-learning 101 series and the free e-books will help.


Articulate Rapid E-Learning Blog - learn about fonts in these games

When building an elearning course there are three main considerations:

  • What content will be in the course?
  • What will it look like?
  • What will the learner do?

Most of the content in the course is text. And the look and feel of the course is also dependent on text. That’s because the text in your course serves two functions: it is what we read and it is a graphic that contributes a contextual look and feel.

How to Learn About Fonts & Typography

In today’s world there’s no shortage of free fonts. The challenge is learning more about them and how they’re best used in your elearning courses. And one of the best ways to learn about fonts is to play some games.

You’ll find a few different activities and games that help you learn more about fonts. But before you jump into the font games, let’s take a step back and think about games in general.

Since this blog focuses on elearning and courses design, look at these font games as if they were elearning courses. What do you like best? Are there things you can apply to your own courses? How do they engage the learning process?

Now onto the games.

Games to Help You Learn About Fonts

Spacing of letters in your words helps make the text easier to read. If you move letters too close together it’s hard to read. And if the letters are too far apart, it’s hard to discern distinct words. The spacing between letters also contributes to the font’s style.

KERNTYPE

Articulate Rapid E-Learning Blog - learn about fonts using kerntype game

Kerntype helps you learn about kerning (spacing) by dragging letters and positioning them to look right. After you drag the letters, you compare your choice to the recommended solution.

I SHOT THE SERIF

Articulate Rapid E-Learning Blog - learn about fonts using I shot the serif game

Fonts have different elements that make them unique. One of those elements are whether it has a serif or not. Can you spot the fonts with a serif? If so, take your best shot.

TYPECONNECTION

Articulate Rapid E-Learning Blog - learn about fonts using the typeconnection game

In a previous post we discussed a few simple rules when selecting font pairs. The TypeConnection game takes it a step farther by letting you match two fonts and seeing how they pair up. It’s a great way to learn about what works and what doesn’t when using different type.

Which game did you enjoy most?

Events

Free E-Learning Resources

Want to learn more? Check out these articles and free resources in the community.

Here’s a great job board for e-learning, instructional design, and training jobs

Participate in the weekly e-learning challenges to sharpen your skills

Get your free PowerPoint templates and free graphics & stock images.

Lots of cool e-learning examples to check out and find inspiration.

Getting Started? This e-learning 101 series and the free e-books will help.


Articulate Rapid E-Learning Blog - record audio narration tips & tricks

Many of you are course designers thrown into the role of elearning developer. And part of developing elearning is recording audio narration. Unfortunately most of us aren’t audio engineers.

In fact, we tend to have limited audio capabilities. For example, most of us have relatively inexpensive microphones, no dedicated recording environment, and limited technical skills. On top of that, we’re pressed for time and need to get the audio recorded quickly.

Audio Narration Setup

In this week’s challenge David asked people to share their audio set up and a few tips on recording audio narration. This is a good challenge because it’s a great way for people to show the different ways they record audio narration.

You’ll see that some have more polished setups and others work with strict limitations like a simple headset microphone and a noisy office cubicle. Check out what’s been shared thus far. You’ll find some really good tips.

Here’s my take on the challenge and a few quick tips.

Home Office Audio Narration

Generally I try to work with the same restrictions that many of you have, so I don’t have an overly fancy audio set up at home where I work. I started with a Samson C01U which was relatively inexpensive and worked fine for what I needed. But I was able to trade up as we brought on more community team members. I gave my Samson to Nicole and upgraded to a Samson C03U. I ended up giving that microphone to Nicola (our German Community Manager) and took David’s Yeti Pro that he was not using. The links to Amazon mics may produce a slight commission.

The secret there is to hire people so you can handoff the old stuff and upgrade your own equipment.

Articulate Rapid E-Learning Blog - audio narration home office setup

I also traded my Wacom tablet to David for the O.C. White Boom which you can see in the picture above. I like the boom because it’s easy for me to swing the microphone in and out of the way when I don’t need it. You can buy a boom for about $200, but I’ve seen some good examples of people converting lamp stands. That might make a nice weekend project.

Articulate Rapid E-Learning Blog - make your own mic stand for audio narration

You’ll notice that I don’t have any sound dampening or a pop filter. I recently moved and my new office room has a little echo. I also use a portable air conditioner. That does impact the recording quality. I can turn off the AC which is fine when it’s not too hot. But if it does get hot, I’m just replacing the steady hum of the AC with the sound of sweat dripping off my bare chest. Either way, it requires some post edit.

Mobile Office Audio Narration

When I’m on the road I may have to record a quick tutorial or do a webinar. I try to travel light and don’t want to bring a bunch of audio equipment so I have a lightweight Samson Go Mic. I really like it. I also bring a cheap Plantronics headset mic because I use it to show the differences between a headset and desktop microphone.

Articulate Rapid E-Learning Blog - audio narration mobile office setup

When I do record, I find the hotel room is usually fine. In fact, they are usually sound proofed so I don’t get a lot of echo and outside sound.

Audio Narration Tips & Tricks

I recorded a test with the three microphones I use. I recorded them at the same time in the same environment and I didn’t use any filters or sound dampening. The microphones were just plugged in and I recorded. This gives you a pretty good sense of the audio quality without any fancy setup or post production.

Articulate Rapid E-Learning Blog - compare microphones for audio narration

Click here to view the microphone comparison.

  • Your best audio is the audio you record first. You can do some post production to enhance the audio, but you can’t make bad audio good. So work on getting a clear sound with little ambient noise.
  • Get your mouth as close to the microphone as you can without pushing the audio levels too high. I usually put the microphone next to my mouth so I am not breathing into it.
  • Record about 30 seconds of no narration. This lets you record the ambient sound and then filter that sound out. You can do that with many of the audio editing tools.
  • Find a way to dampen the sound. Cubicle walls are good for this. Perhaps you can find a few extras to use. I’ve seen people put small boxes around their mics and then put foam in the box. I’ve also seen people record with a blanket over their heads. Perhaps there’s a market for an audio narration burka.
  • Cover distracting ambient noise with a soundtrack. Sometimes you can’t easily hide the AC or other ambient noise. In those cases try adding an audio soundtrack like some soft music to the background. You don’t want it too loud, just slightly perceptible. Make sure you have rights to the audio used. Also it’s better to use music than a song with lyrics.
  • Don’t stress about it. Most people who listen to your courses are listening through those crappy headphones that their employer provides or some basic computer speakers. They’re definitely not in a Hollywood studio with THX sound. As long as you get good crisp narration, that’s probably OK for many of your co
    urses. So relax.

Audio Narration Resources

Here are some additional tips to help with recording your audio narration:

Do you have some tips and tricks? Why not jump into the challenge?

Events

Free E-Learning Resources

Want to learn more? Check out these articles and free resources in the community.

Here’s a great job board for e-learning, instructional design, and training jobs

Participate in the weekly e-learning challenges to sharpen your skills

Get your free PowerPoint templates and free graphics & stock images.

Lots of cool e-learning examples to check out and find inspiration.

Getting Started? This e-learning 101 series and the free e-books will help.


Articulate Rapid E-Learning Blog - provide effective feedback through decisions

Good online courses provide feedback throughout the course. The trick is making sure that it is meaningful and effective feedback.

Here’s an approach that’s typical of a lot of elearning courses. We provide a few screens of information then a quick knowledge check to see what they know. Then provide some more screens of information with another quick knowledge check. At the end of it all, we have them complete a multiple choice quiz.

Articulate Rapid E-Learning Blog - slide, slide, quiz basic elearning

That’s how many of us learned to build elearning courses. I call it the “slide-slide-quiz” technique. It’s not necessarily a bad process depending on the context of the course, but often it’s just a massive information dump with screen after screen of bullet points and simplistic quiz questions.

And then when it comes to feedback it’s usually not very effective because the knowledge checks and quizzes tend to be simple and at best provide basic incorrect and correct prompts. However, life isn’t like that. It’s a lot more nuanced and right and wrong decisions have meaningful consequences to what we do. Which means that simple correct and incorrect prompts may not be the most effective feedback you can provide.

Here are a few tips on providing more meaningful and effective feedback.

Replaces Quiz Questions with Activities to Create Effective Feedback

You can still use the slide-slide-quiz technique. But replace the quiz question with a meaningful activity. The key with the activity is that you’re not just testing knowledge. Instead you get them to apply what they learned in a relevant context.

This lets you ascertain their current level of understanding and the learner can feel confident that they’re learning and moving forward. It’s also a way of directing them to remedial content sooner than later.

Articulate Rapid E-Learning Blog - create practice activities for effective feedback

Real World Consequences Provide Effective Feedback

With performance-based courses I like to place the learner in a position that mirrors what they encounter in the real world. Most likely they’re not sitting around reading manuals and bullet point slides. Instead they interact with people and the work environment making decisions that produce all sorts of consequences.

Articulate Rapid E-Learning Blog - practice activities should mirro real world context

So the first step is to frame the learning experience in a real world context where they make meaningful decisions. And then the next step is to provide feedback that shows the impact of the decisions and actions a person makes. In the real world there are consequences to what we do and they tend to impact the world around us for good or bad. Build your feedback to reflect that type of consequence.

Make a good decision and sales go up or a customer relationship is repaired. However, making a poor decision costs the organization money or perhaps something like a work place injury.

Exaggerate the Consequences for Effective Feedback

Because it’s an online course you may have to amplify or over dramatize the activities, feedback and consequences. For example, in the real world an angry customer may leave the store if you make a wrong decision. Sure, you lost a potential sale, but odds are the company is not going to go bankrupt and most likely not even be aware of the lost sale.

Articulate Rapid E-Learning Blog - compress decisions to provide effective feedback

However, in an online training environment, you have to compress the events and exaggerate their impact. Compressing also allows more decisions to be made than might happen in a real world environment. And exaggerating the consequence amplifies the impact of the decisions made.

As an aside, exaggerated consequences can also be an effective way to bring humor into the course.

If you’re building simple, information-based courses with no performance impact you can probably get away with simple knowledge checks and minimal feedback. However, if your course is designed to change behaviors and improve performance then you’ll need to find ways to provide meaningful and effective feedback.

What are some ways you provide effective feedback in your elearning courses?

Events

Free E-Learning Resources

Want to learn more? Check out these articles and free resources in the community.

Here’s a great job board for e-learning, instructional design, and training jobs

Participate in the weekly e-learning challenges to sharpen your skills

Get your free PowerPoint templates and free graphics & stock images.

Lots of cool e-learning examples to check out and find inspiration.

Getting Started? This e-learning 101 series and the free e-books will help.