


This was incredibly helpful. THANKS SO MUCH!!
Clean Up Your Client’s PowerPoint Slides with This Time-Saving Tip
December 4th, 2012
Here’s a common issue: your client gives you a PowerPoint file that doesn’t look all that great. It’s the breeding ground for a classic Frankencourse with too many fonts, the wrong colors and hokey images. It’s a complete mess. And your job is to clean it up.
At this point the client’s not asking you to rebuild the course. He just wants it cleaned up and published. In an ideal world, you could push back and tell him how this is not great elearning; and then lament the demise of elearning and all things good.
But that’s not gonna fly with the client. So for today’s demo we’ll just assume that you need to clean the content up a bit and get it out the door.
Working with the Master Template
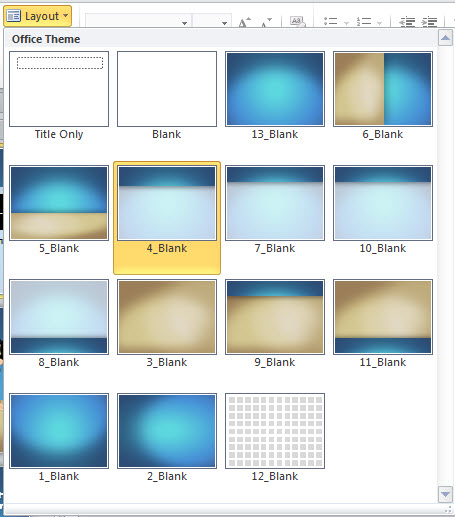
In PowerPoint you can build as many master slides and layouts as you need.
The easiest way to clean up your client’s slides is to start with the master slide. Create the look you need, and then apply the master template to all of the slides. In seconds what once was not so good is now a nice clean and usable product.
But here’s the kicker. Your client didn’t use the master slide to create the course. He worked on one slide at a time. So each slide is independent of the others. That means you can’t easily make universal changes to the file by applying the master slide and layouts.
What are you to do?
Start with the Master Slide & Layouts Anyway
The client may not have started with a master slide, but there’s no reason why you can’t create a master slide and a few layouts to define the project’s look.
- Look at all of the slides using the slide sorter view. That gives you a big picture overview of the course. You’ll start to see some common elements and layouts.
- Categorize the different types of slides and what design elements you’ll need based on the most common layouts.
- Build the appropriate layouts for those slides in the slide master.
- Then apply the layouts to the slides.
Not all of the slides will accept the changes via the layouts, but many of them will and that will save some time.
When you’re done, you can go through each slide and make the edits you’ll need to make. Odds are that many of the slides will work with the new layouts and not require a lot of tweaking.
The Floating Style Slide
In a previous post on making your elearning courses look good I showed a simple tip for creating a design slide. I call it my floating style palette because I can move it from slide to slide and quickly apply changes.
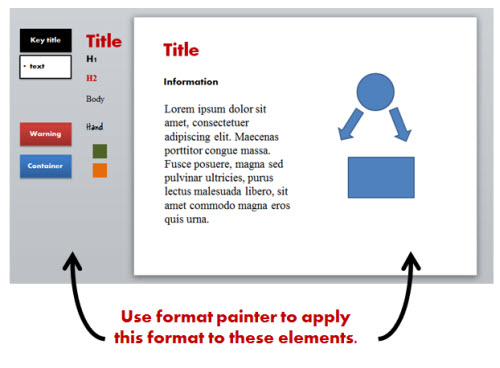
Essentially you create a single slide that contains all of the screen elements for the course. Format those elements and then use the format painter to apply their style to the slide objects.
An example would be the title and body text used in the course. They’ll have a font style, size, and color. You can copy and paste the element from the palette slide to the course slide. Then use the format painter to apply the text formatting to the course text.
Once you have a floating style palette, go through all of the client’s slides where the master slide changes didn’t take hold. Use the floating style palette to apply the appropriate changes.
Making Universal Changes to Your Fonts
PowerPoint has a feature that lets you find and replace fonts. That means you don’t have to do that on a slide-by-slide basis. This really comes in handy since almost every single slide will have some sort of text.
The Replace Fonts feature is one of those that are kind of buried in PowerPoint. Your best bet is to add it to your custom tab in PowerPoint. This way you have quick access to it when you need it.
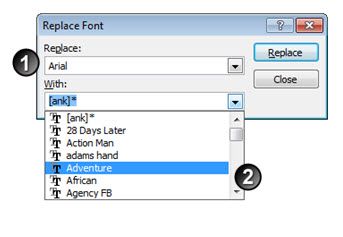
- Select the font you want to change.
- Select the font you want to use instead.
- Click Replace.
All of the text with fonts you don’t want will be swapped out with the fonts you do want. Talk about a timesaver!
So to summarize the steps: 1) create a master slide, 2) reformat the objects that don’t work with the master, and then 3) replace the fonts. Those three tips will help you quickly clean up your client’s not-so-great PowerPoint slides.
Here are some other tips from previous posts that may help, too.
- Start with some existing content to create an elearning template with no money down.
- At a minimum, having a nice background is a good place to start. That’s where the 30 second template technique comes in handy.
All of these tips will help you convert what may be a sloppy start to something that at least is consistent and looks better. And once you’ve got that done, you can start talking to your client about how to make the elearning course a bit more engaging and interactive.
Events
- Everyday. Check out the weekly training webinars to learn more about Rise, Storyline, and instructional design.
Free E-Learning Resources
 |
 |
 |
|
Want to learn more? Check out these articles and free resources in the community. |
Here’s a great job board for e-learning, instructional design, and training jobs |
Participate in the weekly e-learning challenges to sharpen your skills |
 |
 |
 |
|
Get your free PowerPoint templates and free graphics & stock images. |
Lots of cool e-learning examples to check out and find inspiration. |
Getting Started? This e-learning 101 series and the free e-books will help. |
14 responses to “Clean Up Your Client’s PowerPoint Slides with This Time-Saving Tip”
Great tips, Tom — another option that can work great is the Reset button. This re-applies the layouts automatically.
Another suggestion I always provide for cleaning up work is to use a copy of the original file — just in case!
[…] More here: Clean Up Your Client’s PowerPoint Slides with This Time-Saving Tip » The Rapid eLearning Blog […]
You read my mind, I have a client wanting this right now. Thank you for your inspiration!
Very timely for me as I have content from a previous slide that I want to present to a new employer with tweaks and a new format.
@ Geetesh – thanks for the tip on the Reset Button.
Good tips. I deal with this quite a bit. I was unaware of the Replace Font feature! That will definately come in handy!
[…] Clean Up Your Client’s PowerPoint Slides with This Time-Saving Tip » The Rapid eLearning Blog […]
Your tips and expertise constantly amaze me!
My thanks.
I am new to your blog and loving your style of writing, and easy to understand hints. Thank you.
[…] Clean Up Your Client’s PowerPoint Slides with This Time-Saving Tip […]
[…] Clean Up Your Client’s PowerPoint Slides with This Time-Saving Tip […]
Tom, thanks for coming to Minneapolis/St. Paul in January to give a Storyline workshop. (That kind of hardiness earns real respect around here.) And thanks for this great elearning blog!


0
comments