


Thanks for this great collection of tips, Tom! My favorite is “Don’t stress about it.” It took me a long time to accept that it doesn’t have to be a for-the-ages, broadcast-quality, Voiceover Hall of Fame production. Crappy headphones and speakers on the learner’s end can, it turns out, be your friend.
Tips & Tricks for Recording Audio Narration
August 5th, 2014
Many of you are course designers thrown into the role of elearning developer. And part of developing elearning is recording audio narration. Unfortunately most of us aren’t audio engineers.
In fact, we tend to have limited audio capabilities. For example, most of us have relatively inexpensive microphones, no dedicated recording environment, and limited technical skills. On top of that, we’re pressed for time and need to get the audio recorded quickly.
Audio Narration Setup
In this week’s challenge David asked people to share their audio set up and a few tips on recording audio narration. This is a good challenge because it’s a great way for people to show the different ways they record audio narration.
You’ll see that some have more polished setups and others work with strict limitations like a simple headset microphone and a noisy office cubicle. Check out what’s been shared thus far. You’ll find some really good tips.
Here’s my take on the challenge and a few quick tips.
Home Office Audio Narration
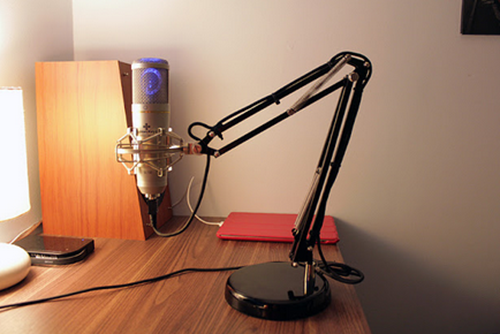
Generally I try to work with the same restrictions that many of you have, so I don’t have an overly fancy audio set up at home where I work. I started with a Samson C01U which was relatively inexpensive and worked fine for what I needed. But I was able to trade up as we brought on more community team members. I gave my Samson to Nicole and upgraded to a Samson C03U. I ended up giving that microphone to Nicola (our German Community Manager) and took David’s Yeti Pro that he was not using. The links to Amazon mics may produce a slight commission.
The secret there is to hire people so you can handoff the old stuff and upgrade your own equipment.
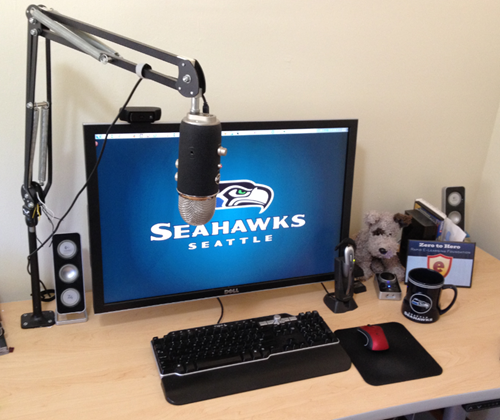
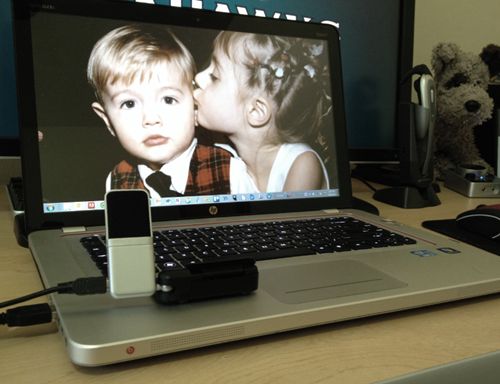
I also traded my Wacom tablet to David for the O.C. White Boom which you can see in the picture above. I like the boom because it’s easy for me to swing the microphone in and out of the way when I don’t need it. You can buy a boom for about $200, but I’ve seen some good examples of people converting lamp stands. That might make a nice weekend project.
You’ll notice that I don’t have any sound dampening or a pop filter. I recently moved and my new office room has a little echo. I also use a portable air conditioner. That does impact the recording quality. I can turn off the AC which is fine when it’s not too hot. But if it does get hot, I’m just replacing the steady hum of the AC with the sound of sweat dripping off my bare chest. Either way, it requires some post edit.
Mobile Office Audio Narration
When I’m on the road I may have to record a quick tutorial or do a webinar. I try to travel light and don’t want to bring a bunch of audio equipment so I have a lightweight Samson Go Mic. I really like it. I also bring a cheap Plantronics headset mic because I use it to show the differences between a headset and desktop microphone.
When I do record, I find the hotel room is usually fine. In fact, they are usually sound proofed so I don’t get a lot of echo and outside sound.
Audio Narration Tips & Tricks
I recorded a test with the three microphones I use. I recorded them at the same time in the same environment and I didn’t use any filters or sound dampening. The microphones were just plugged in and I recorded. This gives you a pretty good sense of the audio quality without any fancy setup or post production.
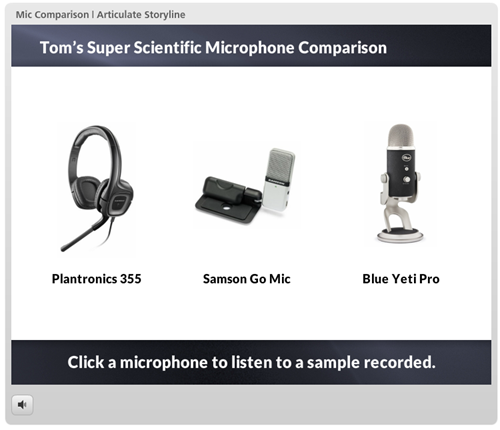
Click here to view the microphone comparison.
- Your best audio is the audio you record first. You can do some post production to enhance the audio, but you can’t make bad audio good. So work on getting a clear sound with little ambient noise.
- Get your mouth as close to the microphone as you can without pushing the audio levels too high. I usually put the microphone next to my mouth so I am not breathing into it.
- Record about 30 seconds of no narration. This lets you record the ambient sound and then filter that sound out. You can do that with many of the audio editing tools.
- Find a way to dampen the sound. Cubicle walls are good for this. Perhaps you can find a few extras to use. I’ve seen people put small boxes around their mics and then put foam in the box. I’ve also seen people record with a blanket over their heads. Perhaps there’s a market for an audio narration burka.
- Cover distracting ambient noise with a soundtrack. Sometimes you can’t easily hide the AC or other ambient noise. In those cases try adding an audio soundtrack like some soft music to the background. You don’t want it too loud, just slightly perceptible. Make sure you have rights to the audio used. Also it’s better to use music than a song with lyrics.
- Don’t stress about it. Most people who listen to your courses are listening through those crappy headphones that their employer provides or some basic computer speakers. They’re definitely not in a Hollywood studio with THX sound. As long as you get good crisp narration, that’s probably OK for many of your co
urses. So relax.
Audio Narration Resources
Here are some additional tips to help with recording your audio narration:
- 4 Simple Tips for Recording High-Quality Audio
- 13 More Tips to Help You Record Narration Like the Pros
- 10 Free Audio Programs
- Should You Add Background Audio to Your E-Learning Courses?
- How to Make the Most of Your Recorded Audio
Do you have some tips and tricks? Why not jump into the challenge?
Events
- Everyday. Check out the weekly training webinars to learn more about Rise, Storyline, and instructional design.
Free E-Learning Resources
 |
 |
 |
|
Want to learn more? Check out these articles and free resources in the community. |
Here’s a great job board for e-learning, instructional design, and training jobs |
Participate in the weekly e-learning challenges to sharpen your skills |
 |
 |
 |
|
Get your free PowerPoint templates and free graphics & stock images. |
Lots of cool e-learning examples to check out and find inspiration. |
Getting Started? This e-learning 101 series and the free e-books will help. |
You might also like:
12 responses to “Tips & Tricks for Recording Audio Narration”
In my experience listeners are much more critical of poorly done audio than they are of poorly done video recording. I refer to this as the YouTube effect (or Americas Funniest Videos). YouTube videos recorded with webcams and smartphones has conditioned many of us to be very tolerant of home video quality. But much of our day to day listening is of professional audio talent on the radio.
We recently upgraded from the Snowball to the Yeti Pro and it’s a big step up. I love the no-nonsense approach with the Yeti – just plug it in and go; there’s not monkeying around with pre-amps or other extra hardware.
Hi Tom,
Great tips! Very useful and liked the comparison of the mics.
Once again, thank you!
Stacey
Thanks for the great tips. Here’s one more to share. If you don’t want to make your own sound insulation box you can buy one. I’ve been using the PortaBooth from Voiceover Essentials:
http://voiceoveressentials.com/
I am not associated with Voiceover Essentials and do not profit in any way from their product. I have, however, been using their product for about 3 years.
I think these are excellent tips if you’re not using professional narrators. I’m curious to know about what percentage of elearning designers are using in-house talent vs. outsourcing the task to a professional narrator when using voice in online courses.
If you’re using a professional narrator, I think it’s worthwhile to have a couple to work with for the sake of variation and in case one is unavailable.
I’m currently using the Sampson C03U and am considering the Yeti. Is there is a reason you preferred the Yeti? Is there a huge difference between the two?
What a great article! We use a Blue Snowball mic and it works great! I just use an empty training room and I never have any issues with ambient noise or echo. We use Replay to edit our voiceovers, and it is easy to add videos in too.
It is a good idea to use various narrators (in-house or professional talent). It breaks things up for the learner especially if you have multiple courses to record. I also find that doing something very simple while recording makes a huge difference in the sound…SMILE! Smiling while you are recoding makes it less monotone and more interesting for the learner.
I was usung an Olympus handheld digital recorder and then editing the audio with Audacity. That actually turned out pretty good. I recently purchased a Blue Yeti(not the Pro) and really like the audio quality! Years ago I added extension glides on my under desk drawer for my keyboard. Extending it all the was out and setting the Yeti on it acts as a really good damper for the mike. Moving away from the mike about a foot eliminates all popping “p” problems. I really like the fact that I can adjust the input gain on the mike; and that it gives me four “patterns” to choose – omni, bi, uni, and stereo. Easy USB plug and play. I’ll be using it a lot!
Thanks for this wonderful informative article Tom.
I am associate with the Online Language Training and this article truly helped.
Hi Tom, great tips…particularly the last one on relax, I sure will. And the comparison of mics, I finally decided on my choice, thanks.
Another lesser known audio recording tip using a lavaliere microphone and a baseball hat.
Clip the mic to a baseball hat brim aimed toward the face. The sound will be clearer with less room noise and the levels will be more focused and consistent as the mic stays the same distance from the face at all times with any head movements.
There are many good quality inexpensive lav mics that are very easy to use and easier to carry. Hope this tip helps.


0
comments