Interactive elearning is all the rage and building drag and drop interactions is getting easier than ever. Drag and drop interactions are great because they get the learners to interact with the screen objects and make decisions. The dragging of objects is also usually more engaging than the more common click interactions.
Here are some previous blog posts on drag and drop interactions for those less experienced:
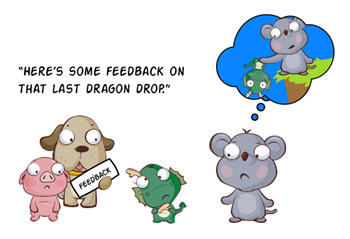
Since many of you are just getting started with elearning and creating drag and drop interactions, I thought we’d review a few ways to provide feedback to the learners as they interact with the screen using drag and drop interactions.
The assumption is that they are making a decision which requires that they drag an object to a specific location (we call that a drop target). Once the object is dropped on the target, they get some sort of feedback acknowledging what they did. That feedback can be immediate or require an additional action, like a submit button.
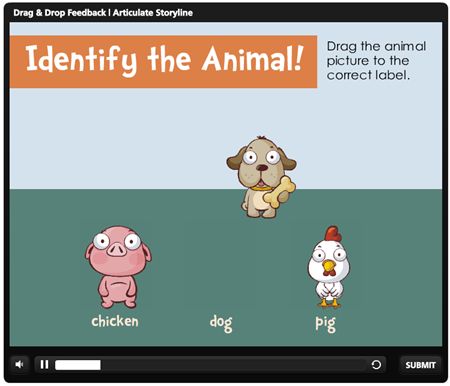
Drag and Drop Feedback: Snap to Target
The snap-to-target mechanism lets the user quickly know that the object has been delivered to an acceptable target. The snap feature also helps keep objects on the screen aligned so that everything looks pretty.
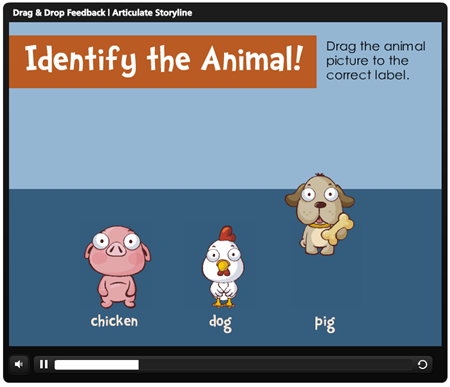
Click here to see the drag and drop example.
I like the snap-to-target option because it lets the person know that they moved the object to a proper location. If you don’t use a snap-to-target the learner may make a correct decision but not have the object aligned enough to the target to register the placement of the object.
Drag and Drop Feedback: Return to Original Location
Many drag and drop interactions are tied to the quizzing feature of the authoring tool. In that case they have some sort of submit button or way to indicate the choice and track the results and, in turn, provide feedback.
There are plenty of times where you may just want them to have the drag interaction but not require the quizzing feature. But you do want to give them correct/incorrect feedback. A simple solution is to only allow correct responses and have incorrect responses return to their starting point.
Click here to see the drag and drop example.
I like this option because they are easy to build and are great for quick knowledge checks. They’re also great to add at the forefront of a topic. For example, let the learner make some decisions and then provide immediate feedback. It helps them see how much they know before you dig in deeper.
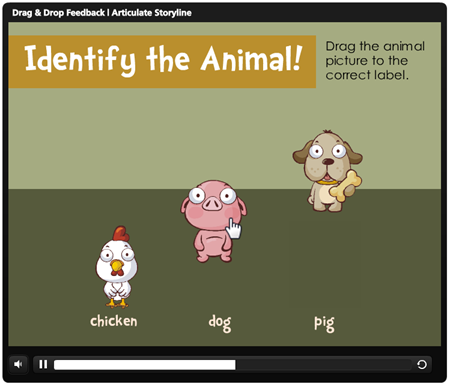
Drag and Drop Feedback: Add Feedback to the Object
When an object is dropped in the correct area, have it change the way it looks. A common state change is to add a check or X mark on correct/incorrect choices. However any type of visual cue works. The key is that you are letting people know what’s right and wrong as they make their decisions.
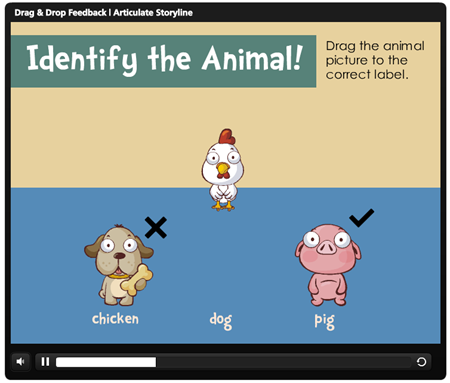
Click here to see the drag and drop example.
I like this because of the visual indications of correct and incorrect. It’s an elegant solution. It’s also helpful to add color cues. For example, red = wrong and green = right. That’s a better cue than a single color.
Drag and Drop Feedback: Feedback Box or Layer
Feedback boxes serve as gate screens. They stop the interaction and allow you to provide feedback. It’s common to have them sit on top of the content which creates space to add more content without taking up the interaction screen’s real estate.
Some people use the default feedback boxes (like I did) and others use layers or lightbox slides. You can also customize the default feedback which opens the doors to all sorts of creative ideas. It doesn’t really matter which you use. They key is using a gate to halt the interaction and give the learner time to process what’s going on.
Click here to see the drag and drop example.
I like gate screens because they do delay the course. Sometimes we get so used to clicking and dragging and seeing all sorts of new content that we don’t always process it or have enough time to do so.
A gate screen helps slow things down a bit and lets the person regroup. Because it slows things down, you want to be sure that you’re using it at the right point. There’s nothing worse than using a gate screen where it isn’t needed and requiring a bunch of extra clicks. Actually, there probably are worse things, like falling into a pond full of piranhas with a slab of bacon strapped to your back. But you get my meaning.
There are a lot of ways to provide feedback in your courses when using drag and drop interactions. Hopefully these four help with your next course design. Let me ask you, when would you choose one of the methods above over the others?
Events
Free E-Learning Resources


0
comments