Great reminders of very useful tips Tom.
Office 2013 makes this MUCH more difficult. I just upgraded to Office 2013 and the whole Insert > Clipart feature has been removed. There is an Insert > Online Pictures replacement where you can type in a keyword and search Office.com, Bing or your Skydrive. However, you can’t limit it to just clip art or just photos. And you can’t tell what file format it is, so it’s hard to tell if you will be able to ungroup. Not a very good change in my opinion. Office 2013 has missed the mark in so many areas.
7 Ways to Create Characters for Your Online Training Courses
September 30th, 2014
In this post we’ll review seven ways to create characters for your online training courses. For the most part these characters can be created in PowerPoint so you don’t need other tools.
Create Characters by Customizing Clip Art
If all you have is clip art then that’s what you have to work with. But you still have some flexibility. Start by selecting the clip art image, ungrouping it, and making the customizations you need. Then regroup it. I also like to save the new image as a .png.
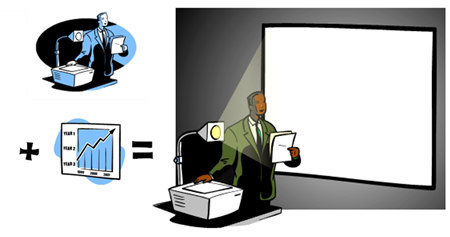
Here are some posts that should help you do this:
-
Little Known Ways to Create Your Own Graphics Using PowerPoint
-
A Simple Way to Create Custom Callouts for Your Courses
-
Create Custom Characters for Your E-Learning Scenarios
With some creativity you can do quite a bit. I try to stick with the same image style and remove all of the background items that make clip art look like clip art.
Create Characters by Pulling Them Out of Stock Images
You can find a lot of stock images for free. However, it’s not always easy to find people who are isolated. But that’s easy enough to do yourself. I look for images with people that I can pull out of the image. PowerPoint 2010+ has a remove background feature that works well in most cases.

Once you’ve isolated the people you can put them over any background or even create silhouettes.
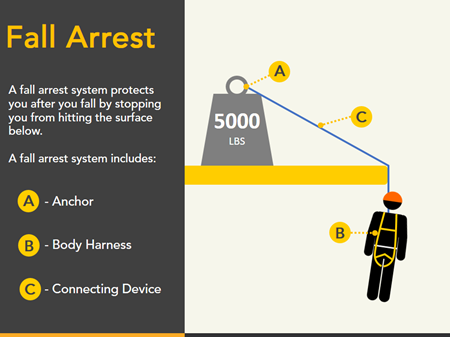
Create Characters by Using Simple Shapes
Pictograph images are common for signs and work well with a lot of procedural and safety training.
-
Create Your Own Custom Characters for Online Training
- Free download to help you get started.
Create Characters by Sketching Them
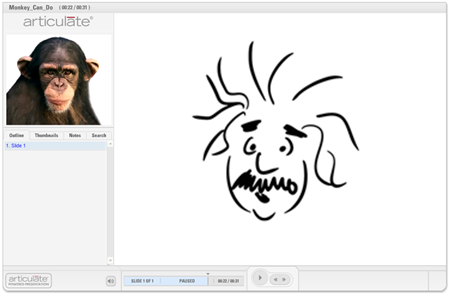
I used to do a lot more sketching of images back when I had one of the old tablet PCs. It’s easy enough to do.
At a recent conference Blair Rorani live tweeted my session and created some cool images. I tried it myself at the workshop in Denver, which you can see below.
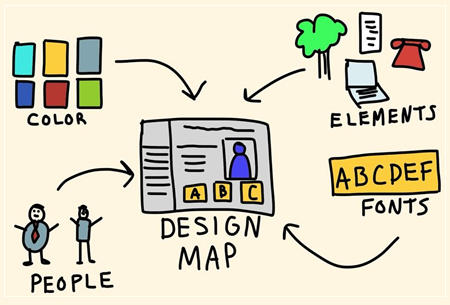
Sketching doesn’t need to be perfect and the organic nature of it provides a novel contrast to what we usually see in our elearning courses.
- I’ll give a plug to Blair’s newsletter where he offers some cool tips and
- Teaches the basics of his sketching ideas
Create Characters by Using a Flat Design
In a recent post I needed some characters that matched the characters David used in his blog post on a weekly challenge. Since it was a flat character it was easy enough to create using PowerPoint.
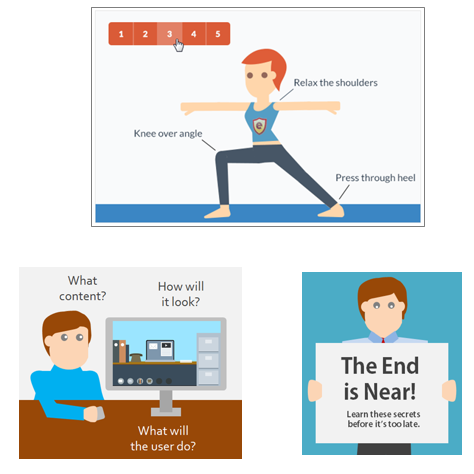
As you can see in the image below, the character is a bunch of shapes combined to look like a person, probably a lot like how we were created.
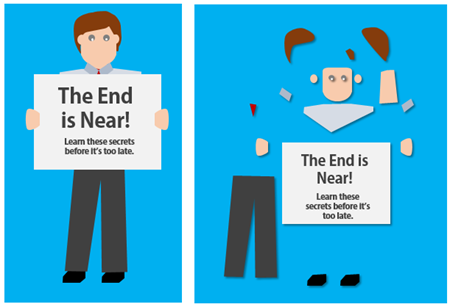
- Here’s the post where the flat characters were used.
- You can download the PowerPoint file and see how they were built.
Create Characters Using Illustrations in PowerPoint
This last technique takes a little practice but offers the most flexibility because you can virtually trace any image you need.
Those who know Inkscape or Illustrator can use those tools to create vector files. But the images above were created in PowerPoint. Once you get a hang of it, creating the images is generally easy.
At least try to create one image and see how it works. I took a stab at creating a self-portrait (and then I squished it a little at the sides to lose a few pounds).

Create Characters by Customizing the Articulate Characters
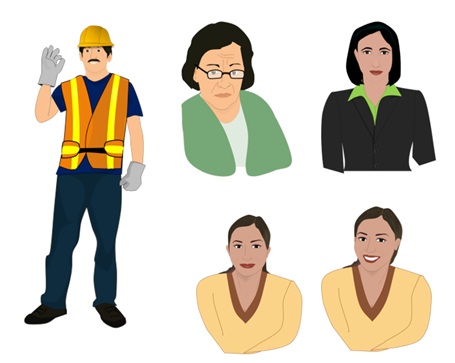
Many of you use the Articulate software. The illustrated characters, just like clip art, can be ungrouped and customized. That means you can change the facial features or modify the outfits, which comes in handy if you have specific work uniforms.
If you use Studio ‘13, insert a character and ungroup it. Then make whatever changes you want. In Storyline, insert a character on the slide and then save as an image. Use the .emf or .wmf format. This keeps them as vect
or images that can be ungrouped. Then bring the image into PowerPoint and ungroup it to make modifications. Save the modified image and insert on your Storyline slide.

Above is an example of a character I modified. I changed the facial features a bit, made her head smaller to look less cartoonish, and put her in a work outfit. I used the Best Buy look to show some branded work attire.
And here’s another example where I combined the characters with some assets from other clip art. I ungrouped the clip art character to use the hard hat and utility belt.

In an ideal world you have access to a graphics person or a budget to buy the characters you need. But that’s not the case for many of you. These tips above should help you get started and give you enough options to create the characters you need.
Events
- Everyday. Check out the weekly training webinars to learn more about Rise, Storyline, and instructional design.
Free E-Learning Resources
 |
 |
 |
|
Want to learn more? Check out these articles and free resources in the community. |
Here’s a great job board for e-learning, instructional design, and training jobs |
Participate in the weekly e-learning challenges to sharpen your skills |
 |
 |
 |
|
Get your free PowerPoint templates and free graphics & stock images. |
Lots of cool e-learning examples to check out and find inspiration. |
Getting Started? This e-learning 101 series and the free e-books will help. |
11 responses to “7 Ways to Create Characters for Your Online Training Courses”
How can you use these customized images as Articulate characters? (not just graphics on a slide)
Thanks for the variety of approaches, Tom. An approach I have used for creating a comic book look is to open photos of willing friends in PowerPoint, crop or remove background appropriately, and apply the Artistic Effect of Cutout. You can use the Color tool to give all the images similar coloring or make each character a different color.
If you do not have friends willing to let you take many photos in different poses, ask students in the Theatre Department of a local college. Then send them the files of themselves as cartoon characters. They love it!
Thanks teacher for all this practical information. You really should consider writing a book on this subject alone. Greetings from Guatemala.
This is a great resource, thanks for sharing.
Fantastic resource; I love being able to customize the built-in Storyline characters. One issue I am running into though, is that when saved as an modified image, the character (no matter which I use) is missing a band of color right across the throat. It’s as though each character is wearing a grey choker necklace. The image appears fine when being modified in PowerPoint 2010, but once I insert the modified image back into my Storyline slide, the greyed out section appears. Any ideas from the group how to avoid this?
I do accept as true with all the ideas you’ve introduced in your post.
They are really convincing and will defnitely work.
Still, the posts are very quick for starters.
May you please prolong them a little from next time? Thanks for the post.




0
comments