The Rapid Elearning Blog

One of the most common scenarios for rapid elearning developers is to take an existing PowerPoint presentation and convert it to an “elearning course.”  Sometimes you get the luxury of meeting with the subject matter expert and then reworking the content to transform it from a presentation to an elearning course.  However, there are many times when you have to take the content “as is” and then put it online.  The subject matter expert’s not too interested in reworking the content much.

Cathy Moore’s Dump the Drone presentation is a good example of the type of presentation a client might ask you to convert and put online.   There’s really nothing wrong with Cathy’s version, but I asked her if I could use it for this post because as Elaine Bettis would say, “It’s blog-worthy.”  The content is great and I don’t have to come up with a fake presentation. šŸ™‚

So here’s Cathy’s slide show that she gave as a conference presentation.


Click here to see the original slideshow.

Now, check out the demo I did using the Dump the Drone slides.  What I did was take Cathy’s  PowerPoint slides as if she were the subject matter expert and then applied different treatments to them. The idea here is not to convert Cathy’s slides verbatim. Instead I want to take you on a tour of different ways you can treat the slides that you get from your client. If this was a real course (and not a demo) I wouldn’t use all of these ideas together. I’d select a look and feel that was consistent throughout the course. This is just intended to give you some ideas to play with.

The Rapid E-Learning Blog - Dump the Drone Demo

Click here to view the elearning course.

There’s more than one way to create your slides.

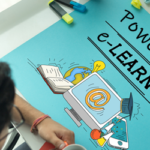
Just because you get a bullet point slide show doesn’t mean it has to stay that way.  Feel free to change the look and feel of the slides.  Look at the images below, they represent the different looks used in the demo.

The Rapid E-Learning Blog - Various presentation styles

As you can see, there are all sorts of ways to present the content.  You have a lot of freedom in how you design the look of the slides.  Even if your client gives you a very bland PowerPoint file, you can dress it up and make the visuals more appealing.  That’s not the case with Cathy’s file, but it might be with your subject matter expert.

Make the navigation non-linear.  

Most presentations follow a linear process where you go from one slide to the next.  When you convert those into elearning courses, you can rework some of the content by creating groups and a branched menu. 

For example, in Cathy’s presentation, I broke a few of the sections down into groups.  For each group I created a main menu.  The learner can click on a section within the main menu.  When they’re done, they always return to the main menu.  

The Rapid E-Learning Blog - Change up the navigation 

To build the menu, I used PowerPoint’s hyperlinking.  That lets me branch to the slide of my choice.  Depending on your software, you can control the branching of your player.  For example, in Presenter ’09, you can set the slides to branch back and forth to the slide of your choice.  That makes this approach very effective.

The Rapid E-Learning Blog - Branching in the slide properties manager

The benefit to this approach is that you can make the course seem more compressed and it gives the learner easier navigation.  They also have freedom to click where they want, which is a little more engaging than having to follow the path you direct.  So if they want to review all of the sections they can, or they can choose to go to the next section.  This works well if you have a mix of new and old learners who need different levels of information.

The Rapid E-Learning Blog - Tracking the user choice

If you notice on the first menu section on the “Corporate Drone,” I even built a little logic in the section.  When you select a path and come back, it’s checked off.  Go to the demo and try it out.  Click on the Mindset button first and see what happens.

Let your learners click on the screen to advance the presentation.

As you go through the demo, you’ll notice that there are some slides with just bullet points.  In some, the bullet points are all on the screen at the same time.  This makes it easy to read and move one.  However, on other slides, the bullet points progressively build. 

Even if you’re stuck with bullet points, there are a number of ways that you can present the information.  Progressively revealing your points is one way.  I think that switching to a handwritten text to highlight key pieces of information looks nice and draws the person’s attention to the screen.

The Rapid E-Learning Blog - Different ways to present linear information

If you can, convert some of your text to graphics.  This works really well if you have audio narration with your slides.  In one of the slides, I took the bullet point info and made it look like a chat session.  Get creative.  Cathy also has some good tips on
how to make your linear navigation more interesting.

Shhh!  Here’s a secret.

A lot of software applications have “Easter eggs.”  They’re secret buttons or steps you have to take to find additional information.  There’s no reason, you couldn’t do that in your courses.

For example, I routinely add secret navigation to my courses so that it’s easier for me to jump around when I test my demos.  I put one in this course, as well.  Click on the top left corner of the screen and you can quickly return home.

The Rapid E-Learning Blog - Secret screens

I also have some of those “Stop…you messed up!” screens, as you can see above.  The learner only sees them when they take a wrong turn.  There’s even a bonus Easter egg.  I’ll give you a hint.  My kids helped me add it and they were laughing the whole time, so it’s going to be juvenile.  Also, there’s a certain irony to the Easter egg. šŸ™‚

I want to thank Cathy for letting me use her slides for this demo.  Aside, from my points, the content is spot on and very relevant to what rapid elearning is all about.

Speaking of Cathy, she’s also one of the presenters at the Articulate Live ’09 conference in Orlando.  She’s doing a session on action mapping that will be really good.  She does a great job teaching you to convert all of the subject matter content to create a great elearning course.  It’s all very practical information you’ll be able to apply to your projects right away.  In fact, if you register before February 20, you can win 2 hours of consulting time with Cathy Moore.  There’s more information below.

One last thing I’ll add because I hear so many negative things about PowerPoint. Outside of the images that came with Cathy’s presentation, everything else was built in PowerPoint 2007.

If you have any tips or tricks when converting your PowerPoint presentations to an elearning course, I’d love to hear them.  Feel free to share them with the community by going to the comments section at the end of this post.

Events

Free E-Learning Resources

Want to learn more? Check out these articles and free resources in the community.

Hereā€™s a great job board for e-learning, instructional design, and training jobs

Participate in the weekly e-learning challenges to sharpen your skills

Get your free PowerPoint templates and free graphics & stock images.

Lots of cool e-learning examples to check out and find inspiration.

Getting Started? This e-learning 101 series and the free e-books will help.


38 responses to “How to Convert Your PowerPoint Presentation into an Elearning Course”

Good post, Tom. The stigma with PowerPoint-based eLearning is that developers tend to make them look like PowerPoint presentations. Bad ones. With lots of bullet points and text and cheesy clip art placed in routine locations.

Itā€™s not that PowerPoint makes a bad eLearning authoring environment. Itā€™s that people are bad at PowerPoint. And that carries over into their PowerPoint-based eLearning. In my organization, we used to be forced to use this horrible template system for eLearning development where each screen required a specific template. Bullets Left/Image Right. Bullets Right/Image Left. Image Center/2-Column Bullets Below. It was horrifying (and developed, of course, by a big-name, big-dollar eLearning vendor/consultancy). Unfortunately, many of our development folks still follow that same mindless routine even though weā€™ve moved beyond that system. Many of the readers here may currently be forced to use a similar design structure.

If we could all purge every PowerPoint presentation weā€™ve ever seen from our minds and start with a fresh canvas, our eLearning development would become dramatically better instantly.

Me, I donā€™t use any slide masters when I develop my eLearning. Only blank slides. And I try to avoid bullet lists wherever I can. I donā€™t want to be constrained to some tired out format that will suck the enthusiasm from my learners on the very first screen.

Great post! Iā€™m a fan of Cathy Mooreā€™s Dump the Drone presentation. And love your spin on it. Youā€™ve definitely demonstrated that rapid does not mean boring. Thanks for sharing!!

I like the various perspectives. What I liked best was the way you made the chat session work. I can see that working in a course Iā€™m building.

Tom, thanks for giving Dump the Drone such an inspired overhaul. I especially like the bright colors and style of the main menu. Iā€™m a big fan of that kind of branching because it gives learners the chance to skip what they already know or go back and review what they didnā€™t quite get. I also got a kick out of the chatā€“much more interesting than bullet points.

To boost transfer to the job, it would be cool to add some thought-provoking interactives that, for example, require learners to rewrite blather or to add conflict to a boring scenario. And some job aids could be added, such as a downloadable cheat sheet that reminds people how to check readability and shows the magazine scores for comparison. Not that you should do any more work on it! It was always intended as an awareness-raising slideshow rather than actual instruction.

Iā€™m looking forward to meeting everyone at Articulate Live ā€˜09. In my session, weā€™ll dig deep into a boring information dump to turn it into a livelier, more interactive course thatā€™s more likely to get results. Weā€™ll identify the business goal, brainstorm activities, and relentlessly chop irrelevant content. Iā€™m already sharpening my notorious machete.

@Cathy: good point. In a real course thatā€™s what Iā€™d do (or at least recommend to the subject matter expert). I think the problem a lot of people run into is that they get real basic slides and are expected to just convert those as is.

In that case, using some of the tips in the blog might help make the PowerPoint structure less PowerPointy. Worst case doing something like you did where they at least can see before and after examples is still better than just telling them what to do.

Your presentation isnā€™t really the best example, because itā€™s not typical of some of the really horrible stuff that people have to work with.

I look forward to the conference as well.

Tom,

One of the most valuable posts yet!

Iā€™m doing very technical training that Iā€™m converting from PPTā€™s. My issue is my market is international. They speak many languages. Do you have any ideas how to approach this?

With text files, I can use on-line translation. But with audio? Or PPT text?

Good post. I look forward to it each time.

Jim

January 28th, 2009

Tom,

Echoing Jim, definitely one very inspiring post for me!

I am guilty of using a slide master for all my e learning courses and it is getting really boring. I haven’t changed it up because it includes the company logo and offers some sort of consistency with the different courses. When we first launched e learning courses, it was suggested that they all have this consistent look and feel since it was a new commodity to everyone.

However, after four courses, I’m sick of it and I’m sure learners are getting the hang of it at this point. I’d like to venture off and like Chris said start with a fresh canvas. Sounds like the conference would be extremely worthwhile.

Thanks again!

Hi Tom

I came across your blog last December, and man, I sure wished I saw this and Cathy Mooreā€™s blog first when I started working as an ID two years ago! This post for instance would have helped me A LOT since most of our resource documents are the PPT training files themselves.

Touching in on the ā€œDump the Droneā€ topic itself: one thing that Iā€™ve learned early on is that the SMEs can get touchy when there is an attempt to rewrite some of the content into manageable or understandable chunks, particularly when theyā€™re the ones who composed it.

What always happens is that we have to back down and give in to the wishes of the SME. Their explanation for retaining the very verbose content is that ā€œif the learners do not get this, then they donā€™t deserve to passā€.

Superb, Tom! Absolutely fantastic! Haven’t felt so excited since I discovered that Thorntons do icecream, too šŸ™‚ (I know, the simple things…)

Jim, there is an ongoing project called eCoLoMedia which is looking at localising multimedia content for different cultures/audiences/markets – written content, voice-overs, etc. A section of it (soon to become available) deals with localising Articulate presentations as far as I’m aware. One of the participants in the projects, Alina Secara, has already blogged quickly about the steps involved in changing the interface labels (https://elgg.leeds.ac.uk/articulate/weblog/13230.html). Hope this is of some help šŸ˜‰

We love your blog! You are very inspirational. In fact, we have a question about one of your techniques that inspired us.

In the “Dump the Drone” presentation, you used the 5 colored column technique to highlight topics and to drive navigation. Did you do that in PowerPoint 2007? If so, do you know how we could do it in PowerPoint 2003?

Thank you and keep up the great work!

January 28th, 2009

Hi Tom

Brilliant post as always. You remind us all to keep it simple. I (and I am sure others) am often guilty of over engineering my elearning courses when most likely it is not necessary.

Keep up the great work, it’s invaluable šŸ™‚

Cheers

January 28th, 2009

Hey Tom,

Regarding your blue slides, with the speech baloons, I’ve noticed a problem when I have multiple things in different areas of a slide change with slide advance. Sometimes the eye may be focused in one area of the slide to catch the change there, but misses the change in the other area. This is particularly true when the eye is focused on the Articulate slide advance button. To get around this, I animate the changed item with a fade-in or something. That slight animation grabs attention and the learner notices, “Hey, something’s happening over there!”.

Here’s a Powerpoint to Articulate caveat regarding hyperlinks: Watch out for relative links; they work in Powerpoint, but Articulate doesn’t like ’em. (Or has that changed for ’09? I need to upgrade!) Of course, if the original Powerpoint links to a destination slide from several different origin slides, returning to origin with relative “previous slide” hyperlink in the destination slide, then the developer must duplicate the destination slide, putting the appropriate absolute hyperlinks in each one.

@JJ: I am getting a lot of emails asking about some of the stuff in the demo, so I’ll do a post on this soon.

@Jim: Good tips. One of the things I like about the new annotations feature is that it’s a lot easier to add those types of call outs without building animations. A big time saver.

I’m a little confused by the hyperlinking issue, you describe. I always use the link to the slide and not the pre-built back/next. This way the link will go to that slide (even if the slide has moved to a different location in the show).

Fantasic – loved that. It worked for me on so many levels!
I am interested in the logic tracking you built in Tom. I am working on a project at the moment that would benefit from that. I am wondering how well that would work with four menu items as opposed to the two you had though. I can only see that if someone jumped straight through to section 3, that after it would show that they had completed 1, 2 and 3….any suggested solutions?

Thanks again!

@Adam: Here’s a blog post that kind of shows how I did the logic trick. It’s really pretty simple and very similar to what I did here. The concepts are all the same, just different choices.

You can also download the PPT files for that post. If you use Presenter ’09 then you can also modify the player branching in the slide properties manager.

It works well for two choices but becomes a pain after that. Essentially you have to make a bunch of duplicate slides. The duplicate slides increase exponentially based on the visits and choices. I wouldn’t recommend it for more than two choices, three if your brave.

Awesome, Tom!

Fantastic post, Tom.

Your posts always open a lot of doors (and windows) to make better e-learning.

I work mostly on technical training. Typically, the kind of information I deal in lots of conceptual information about complex technical subjects, simulated procedures, and very rarely some scenario/examples (as the SMEs have very little/no time to provide these). If you have some tips on dealing with this kind of content, do please share.

This might sound like a really naive question, but I did like to know how we can add up handwritten text to the slides.

Thanks again for sharing these expert tips and tricks,
Ruchi

Sir Tom,

thankz for that.. it’s a good point.. continuing great works makes us happy šŸ™‚

Got it.
I was using the pointer options in PPT slide show; the writing hardly comes clean and sharp.

Wasn’t aware that we have fonts for this.

Now,a related question. How did you add up effects to different texts (like the gradient in the title on the main slide and the inverted arrow)?

Thanks,
Ruchi

Thank you for your most recent blog, it has really opened my eyes to the innvative ways we can design our training. I do have a question though. When you converted Cathy’s presentation into something more interactive, you made use of clickable areas on the screen, how do achieve this?

I was wondering if you could explain something to me.

I am trying to make some parts of an image clickable so when the user click on a specific part of the image, it brings them to another slide in my PowerPoint, and then from that slide, they go back to the image, and click on another part that takes them to a different slide.

I see that you do that in most of your demos, but I can’t figure out how to do it in PowerPoint.

Thank you very much for your help. It’s greatly appreciated!

January 29th, 2009

Tom,

Sorry, I believe I misled about hyperlinks. Here’s what I should have said.

Sometimes, someone puts in hyperlinks using Powerpoint’s Action Settings. Action Settings will allow them to hyperlink from, for example, Slide 5 to an Appendix A near the end of the deck. Then on the Appendix A slide, they again use Action Settings to create a hyperlink back to “Slide Last Viewed”. Then suppose that on Slide 10, they again hyperlink to the Appendix A.

The hyperlinks in Slides 5 and 10 are absolute links because they point to a specific slide. But the hyperlink in the Appendix A slice is a relative link, because it returns the viewer relative to where they came from.

Now in show mode, when viewing the Appendix A slide, Powerpoint is smart enough to know where the viewer came from, and return them to Slide 5 or Slide 10 accordingly.

But if you try to publish this in Articulate Presenter, it doesn’t work, because Presenter doesn’t recognize relative links (at least my old version 5).

To fix, one has to duplicate the Appendix A slide, giving the first one an absolute link back to Slide 5, and the second one an link back to slide 10. Then you have to go to Slide 10 and change its link from the first Appendix A slide to the second Appendix A slide.

Now I’ve probably made this clear as mud.

Tom, did you link to a slide in your presentation on the slide that has the Click here to learn more hyperlink? Everytime I’ve tried linking to a slide within the same powerpoint, it doesn’t work after I publish it.

This article came right on time!

Great post. Two presentations in one, both with valuable information. The black screen with the white text is sort of like clearing your head – simple, great technique.

[…] How to convert your powerpoint presentation into an e-learningcourse The Rapid eLeanring Blog ger vƤldigt bra och handfasta tips om hur du kan gƶra en bra slideshow fƶr e-lƤrande. […]

[…] How to Convert Your PowerPoint Presentation into an Elearning Course […]

I look forward to your blogs and you never disappoint!

[…] How to Convert Your PowerPoint Presentation into an Elearning Course […]

[…] gotten a lot of emails about the template I used in the Dump the Drone demo.  So I’m going to show you how I built it (all inside PowerPoint) and then […]

[…] molesta. Tom Kuhlmann, The Rapid E-Learning Blog (bloc d’aprenentatge elearning r

@Adam:

I experimented with making larger linking logic and I think you experience a law of diminishing returns after 3-4 choices in this format. Each new choice creates more combinations, which is actually governed by Pascal’s Triangle:
2 choices needs 1+2+1=4 slides
(1 slide with no choice, 2 with 1 choice, 1 with all choices )

3 choices needs 1+3+3+1=8 slides, and 4 choices needs 1+4+6+4+1=16 slides. I’d say that’s the highest you could do comfortably and maintaib the linking structure without going crazy.

The programmer part of me cringes to do combinatorics instead of an actual state machine, but the point is, it works and it’s not -too- ugly. šŸ˜‰

[…] Then go and see the guru of branching scenarios, Tom @ The Rapid E-Learning Blog. […]

[…] did a quick version of this on the blog post about building elearning courses in PowerPoint. The chat section is only a few slides.  Click the play button to […]

[…] How to Convert Your PowerPoint Presentation into an Elearning Course The Rapid eLearning Blog […]

[…] How to Convert Your PowerPoint Presentation into an Elearning Course […]

[…] Making Change: Cathy Moore does a good job providing tips that will improve how you write for your courses and with your instructional design. [original post]  […]

[…] How to Convert Your PowerPoint Presentation into an Elearning Course […]

[…] How to convert your Powerpoint into an E-learning course – Rapid E-Learning […]