


Oh my gosh! Just the other day I was thinking that there has to be a way to pick from a bunch of items I’m working on. Tom comes through (yet again) with the solution. I don’t know what I’d do without you Tom!
The Hidden PowerPoint Shortcut Everyone Should Know
September 23rd, 2008If you’re like me, when you use PowerPoint to build your rapid elearning courses, you end up doing a lot of copying and pasting of objects. Or you seem to be inserting the same images over and over again. Well, here’s a tip that’s going to save you time and make your life a whole lot easier. Your family will love you, coffee will taste better in the morning, and "three little birds will line up on your door step, singin’ sweet songs of melodies pure and true."
Understand the Clipboard
When you copy an object, it gets loaded into a clipboard. The clipboard is a temporary area that holds the copied information. This allows you to go to a different location and paste the clipboard object.

Use the Clipboard as a Temporary Library of Objects
Most people already know how to copy and paste objects on the screen. In fact, my guess is that it is one of the most frequently used features in PowerPoint during the production process.
What most people don’t know is that the clipboard can hold up to 24 items. This comes in handy because you can preload it with all sorts of content. Then when you need it, open the clipboard and paste it on the slide.
The steps are real simple:
- Click on and copy your object: CTRL+C. This loads it into your clipboard.

- Open your clipboard. You can find the clipboard by pressing ALT+E, then B.

- The clipboard is open and shows you all of the objects that are loaded in it. When you need one, click on it and it will paste onto screen. It’s as simple as that.

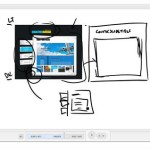
Check out the Tutorial

Click here to view the tutorial.
If you find that you’re always copying and pasting the same stuff, this is a time saving tip. To really get a sense of how ii works, just watch this quick tutorial that I put together. It gives you an idea of how using the clipboard can make production a lot faster.
Feel free to share any tips and tricks that you use by clicking on the comments section.
Events
- Everyday. Check out the weekly training webinars to learn more about Rise, Storyline, and instructional design.
Free E-Learning Resources
 |
 |
 |
|
Want to learn more? Check out these articles and free resources in the community. |
Here’s a great job board for e-learning, instructional design, and training jobs |
Participate in the weekly e-learning challenges to sharpen your skills |
 |
 |
 |
|
Get your free PowerPoint templates and free graphics & stock images. |
Lots of cool e-learning examples to check out and find inspiration. |
Getting Started? This e-learning 101 series and the free e-books will help. |
You might also like:
31 responses to “The Hidden PowerPoint Shortcut Everyone Should Know”
Good one Doof.
Be careful cutting and pasting pictures. Your Powerpoint can become huge in no time.
If you save the picture as a jpg and then insert it into your slide it will take up much less memory. Follow these steps:
Insert/Picture/From File, select the jpg file you want to insert. There is no loss of quality.
I once shaved 100 MB off a file someone sent me by cutting their pictures, saving them as jpgs and inserting them this way.
Once again, thank you for a really simple, but practical tip, that I have not thought about using. Using Articulate Presenter has become high priority for our organization and your tips help me to do my job better and make my presentations more professional.
This was a good eLearning exercise for me. It reinforced the idea of eLearning. I took the time to read this entry because it was attractive with images, sure, but the touchdown was really the subject matter and how it was SO relavent and applicable to what I do. And my attitude is that I’m always open to tips. Now the challenge is to get my learners to that point as a Curriculum Developer. Thanks for the object lesson, Tom.
This works across Office programs as well, so you can copy a bunch of items from Word (for example), then go back to PowerPoint and use the clipboard to paste them in. It is a timesaver, eliminating the need to toggle between programs. It is also important to note that once there are 24 items on the Clipboard, the next item that you copy will push the oldest item off the clipboard (i.e. overwrite it).
Great post as usual. Here is my question. How do you build slides like the one that you used for this post in the tutorial that afeature you demonstrating something on your screen and talking over it??? How can you make slides like these part of a larger presentation/training? Have you covered that already?
When in Power Point 2007 you can also get to the clipboard from the Home tab. Select the far left Icon on the ribbon. Down in the lower right corner of the icon is a little arrow. Click that arrow to open the clipboard. Click the arrow a second time to close the clipboard.
Of all the training-related newsletters I receive, this is by far my favorite. Thanks for another great practical tip to speed up development time.
I am working on my first presentation. Your Blogs are extremely helpful.
How do I add the Engage item into power point?
Never really thought of preloading upto 24 items on my clipboard for repeated usage items. Thanks for the tip.
Great post. I dig the Bob Marley reference!
Good, strong advice. If you are looking to exceed the 24 items, consider the small tool called GradeEaze (http://gradeeaze.rwjacksons.com/index.htm). Although its original use was to aid in providing grading comments, it is, essentially, a customizable clipboard.
That is, you copy text, picture, etc. into a database for use at some future time.
I have to say that 7 min of ‘getting the most out of your clipboard’ was a bit long and drawn out. I use the functionality of the clipboard a lot and it is great. This clipboard functionality has been around since before version 2007. I do agree that copy / paste of images bloats powerpoints. If you do copy / paste, use the Compress Pictures option from the Picture Tools / Format ribbon to reduce the size of the images, as applicable.
Great post as usual. Very impressive way to instruct little and helpful things via blog and simulation. With your tips and tricks a tool like Articulate Studio gets so much better…
Nice work, Tom, thank you
Stefan
This is an awesome tip!
Thank you Tom.
This is a great tip.
I posted a blog a few months ago on how to compress and reduce the size of your powerpoint presentation.
Sue, this will save you time … rather than converting images to jpgs.
http://businesstoolsblog.com/2008/06/compress-reduce-the-size-of-a-powerpoint-presentation/
Tom,
That’s a great tip for opening the Office clipboard. There are actually two clipboards you can use: 1) the clipboard that comes with Windows and that only holds one item at a time and; 2) the clipboard that comes with Office 2003 that holds up to 24 items at a time. The Office 2000 clipboard only holds 12 at a time.
My best powerpoint tip is to press . (period) when you need some attention. It makes the screen go black. Then press period again to resume.
Thank you very much for your very useful blog. Your screen capture seems to be larger than a regular powerpoint (720*540) and fills the whole Articulate player screen (980*560). Can you tell us how to do that ?
Thanks a lot.
I found the answer to my own question. If you type ALT+N it opens the INSERT tab and there are letters over each command in that tab… so the key command ends up being ALT+N, P to “insert picture”
I just thought I would share that in case anyone else loves using key commands to make life easier.
Re Karen’s keyboard shortcut … I think that must be for 2007 because in Powerpont 2003, the shortcut is Alt+I, P, F to insert a picture from file (that works in Word and Excel 2003 as well).
Just clarifying for those of us who haven’t upgraded but love keyboard shortcuts as Karen does!
[…] [L][C] […]
[…] » The Hidden PowerPoint Shortcut Everyone Should Know The Rapid eLearning Blog (tags: elearning powerpoint tools productivity) […]
[…] found two posts on The Rapid eLearning Blog; the first one gives simple tricks and tips that make working with PowerPoint more productive, the […]
To open your clipboard quickly, use the ctrl + CC keys..Its faster than Alt + E & B.
I am an Articulate newbie. I am curious how you do those wonderful software demos. What software do you use? How do you insert it into Articulate? I’ve done a bit of experimenting Captivate, but i can’t make it look anything like yours. Please give some pointers ro direct instructions.
Thanks!
Tom,
Great topic…Question, how were you able to embed the SeeqPod player in your post? The “Embed” button suggests a user would be able to copy, then paste(the player)into another presentation but, all I get when I do that is the raw URL, no player. Hmm. I scanned the SeeqPod site for details, no luck.
~Thanks


0
comments