


Breaking apart and regrouping elements from clipart is probably the best unknown little secret in elearning graphics. This is a great post demonstrating what most people aren’t aware of – the unlimited creative possibilities!
Create E-Learning Templates With a Consistent Clip Art Style
June 8th, 2010
It would be great to have a graphics artist on staff who could build the graphics you need for your elearning courses. But the reality for many of us is that’s not going to happen. So you’re left to fend for yourself.
In previous posts, I shared a lot about how to customize your clip art so that you have some flexibility when building your elearning courses in PowerPoint. In today’s post I want to expand on that a bit by showing you how you can use a single clip art style to create your basic elearning template.
Find a Style You Like
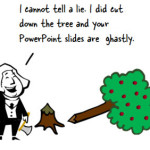
Look over the clip art that you have and locate a style that you like. For this post, I’m using Style 802. What I like about it is the hand drawn look and simplicity of the style. I also like that there’s a lot of variety.
A few things that I look for:
- Characters: What type of people, poses, and variations exist? I look for heads that can be removed and matched to other bodies. This way I can create the same character in multiple settings.

- Objects: What objects are available that I can pull out and use? I look for rectangular shapes that could become boards or pieces of paper. Computers are another hot item for elearning.

- Lines and shapes: Are there some shapes or lines that I can pull from the clip art and use in other places? Style 802 is a good example for this. The images have a hand drawn look. Adding a PowerPoint shape or line really stands out. So I want to find lines and other shapes I can pull from the clip art and apply elsewhere.

Play Around with Ideas
Try to build a template structure using elements from the clip art. For example, you probably need some content boxes. Perhaps you’ll want sections or menu options. You might even offer a little resource section with clickable icons.


You might also change up the look. Many times, the images are all sized the same way. Try something new. Make your images real big. Or, make them real small. Flip them. Crop them. Bring them in at different angles. Try bold colors. Make a comic book panel.
Once you start moving the images around, you might find some interesting layouts.


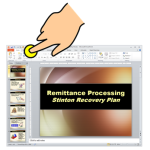
I created a quick mockup using the Style 802 clip art. Hopefully, it gives you some ideas for your next elearning course.
I also included the PowerPoint files so you can see what I did. Feel free to break them apart and build your own ideas. Download the PowerPoint files used in this post.

There’s a lot more that you can do with these clip art styles. Then main thing is to train your eyes to recognize usable shapes and lines, as well as which characters work.
Here’s a link to some clip art styles that might work for this. What clip art style do you think work best? Add your favorite by clicking on the comments link.
Events
- Everyday. Check out the weekly training webinars to learn more about Rise, Storyline, and instructional design.
Free E-Learning Resources
 |
 |
 |
|
Want to learn more? Check out these articles and free resources in the community. |
Here’s a great job board for e-learning, instructional design, and training jobs |
Participate in the weekly e-learning challenges to sharpen your skills |
 |
 |
 |
|
Get your free PowerPoint templates and free graphics & stock images. |
Lots of cool e-learning examples to check out and find inspiration. |
Getting Started? This e-learning 101 series and the free e-books will help. |
You might also like:
44 responses to “Create E-Learning Templates With a Consistent Clip Art Style”
I usually recommend avoiding clip art for professional presentations of any sort, but the reality is that sometimes it’s clip art or nothing at all. In those cases, sticking with a consistent look and doing a few simple edits to the clip art (which can be done right in programs like Microsoft Word using the drawing tools) can make a big difference. Thanks, Tom!
Your tricks and tips on ungrouping and changing clip art you have shared through your blog has been invaluable! Thank you, Tom, for sharing all your wonderful work! It is a huge resource!
Has anyone tried to access these images today? I just tried – Microsoft has changed their image download page and it looks like the styles listed on 15 Interesting Clip Art Styles for Your E-Learning Courses are no longer available. Anyone else find a new link?
Tom: BTW what font did you use for your demo? It went with the theme very well.
I’m considering converting a long-standing (and often-updated) technical (geological/engineering) professional course to an online course. Like SusanC, I’ve always avoided clip art, but now I’m rethinking that to avoid nothing but bullets and words. Any recommendations on clip art styles that would help make a point and perhaps engage the participant without being distracting?
Linda,
When I clicked on the links for the clipart, the Microsoft website initiated a search. Of the three styles I tried, I was able to open two, including style 1568.
I hope that this helps.
Amy
Great information, and very timely! I have two current projects that I’ve been agonizing over regarding the need for consistent artwork. I’ve broken PPT images apart for years, but have not taken it to the extent you’ve illustrated in this post. Please keep this information coming… you’ve been a lifesaver!!
FYI… the links didn’t work for me either.
Why would Microsoft discontinue some of their clip art? Their new site is very slow to search and right now isn’t working for me at all. I guess it is a good thing that I had downloaded some of the clip art that I liked a while ago, even though I thought that it would always be on their site… Very disappointed in Microsoft. I’m hoping that is just an oversight on their part and that they just haven’t finished converting them over to the new system (fingers crossed).
This was an excellent blog! I am a visual learner and this gave me some great ideas on how to make clip art more effective during presentations.
Tom
The T& C on the MS site specifies that the images can’t be used for commercial use – last time I checked.
I am I interpreting this wrong?
Tom, I hate to sound so newbie, but several of the styles (like 1541)that you mentioned using just don’t ungroup for me. Is there some kind of special way to download? I’ve done some really simple ungrouping and am trying my had at more complex ones! Thanks for the suggestions!
Its a nice post. Thanks
[…] by Tom Werner on June 10, 2010 Tom Kuhlmann gives insider tips and tricks on how to use clip art in e-learning. […]
Wow, I just tried to search styles 1539-41 and they are not available. These were some of my staples! Anyone have any clue as to where they have disappeared to? 🙁 I assume you type in the style into the search field, correct?
Oh wait, you don’t have to type in the word ‘style’…I see 1541, looks good! but style 1382 is gone now, I was using that for the courses I am creating right now! Bummer….
This was excellent information! I always wondered how people make their powerpoints so interesting….I was unaware that you can manipulate and change the clipart so much!
I have noticed that since the rework of their site, when looking for styles you need to capitalize the word “Style” to get your results. Seems odd that they would go case sensitive, but hope the tip helps people find what they are looking for.
Wow, I had no idea you could do this! I started playing around with various images, and have come up with one problem I can’t find a solution to. I am trying to edit clip art from Style 1191, and am finding that some of the black lines intersect and so they are considered one object. For example, in the image of the blueprint, blocks and computer mouse, I can delete the blocks and most of the mouse, but the part of the mouse that connects to the blueprint does not seem to want to go away, no matter how many things I try. I would like to have the blueprint alone. Any tips on how to work with situations like this?
Thanks!
[…] Create E-Learning Templates With a Consistent Clip Art Style […]
I am a relatively new reader here, how do I find clip art with “style 802”. I browsed around the MS site but could not find a search field for it.
Thx Tom. How am I able to compare styles? Or see what style a random clip art piece belongs to?
Great post. Some great ideas. Definitely learned some stuff about clipart and I am sure to use some of them.
Great post, Tom! I’ve bookmarked it for my students. Over and again, the examples you provide come to emphasizing elements of visual design. In particular, here you mention (a) unity in your images and fonts, and (b) contrast to show importance, relationship, and hierarchy.
Thanks for the examples.
Love the tips & tricks for clip art, but what I’m really interested in is the “behind the scenes” of the module. There’s a lot of branching and the controls often toggle between the Articulate controls and the action buttons in the PowerPoint. Are there some Screenrs or other resources that really dig into how to do that type of branching?
[…] Comic look […]
What software allows me to grab, change, and modify clip art?
[…] create your own layouts with existing clip art. Here’s an example I shared in this blog post on using Clip Art to create your elearning template. This also lets you build a layout that has that hand-drawn […]
Dear Tom,
You never cease to amaze us! Thank you so much for fun, learning and sharing! I’m going to design my templates. If I recall correctly, once you published a content on how to hide objects from slide to slide to give an “appering affect or motion”…May you remind us how?
Many thanks indeed!
Ernesto
@Tom am a great fan of ur’s.
i regularly recieve rapid elearning blog.
am new comer in this field of instructional design.
i want to make a mark in this field .
Can u please suggest me ways means of writing a design document for any elearning course.
I need new tips and techniques of improving the academic e learning courses .
PLS help me in this regard
[…] create your own layouts with existing clip art. Here’s an example I shared in this blog post on using Clip Art to create your elearning template. This also lets you build a layout that has that hand-drawn […]
[…] из клип-артов для создания собственных шаблонов http://www.articulate.com/rapid-elearning/create-e-learning-templates-with-a-consistent-clip-art-sty…. В этом посте также описывается то, как вы можете […]


0
comments