

[…] Original post: How to Create an Interactive PowerPoint Elearning Module » The Rapid eLearning Blog […]
How to Create an Interactive PowerPoint Elearning Module
September 11th, 2012
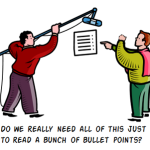
In a recent post we looked at ways to build interactive elearning even if using PowerPoint to build the courses. One of the demos I shared prompted lots of questions. So in today’s post I’ll show you how I created the PowerPoint interaction. This lets us look at some essential production tips when using PowerPoint to build interactive elearning.
PowerPoint Tutorials
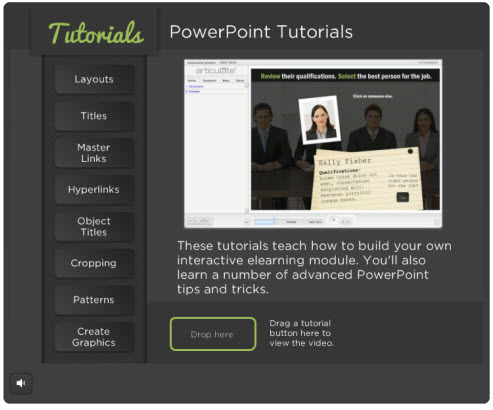
Click here to view the tutorials.
Review the PowerPoint interaction to see how it works. I also included a link to download the PowerPoint file so that you can see how it’s assembled. This may help when viewing the tutorials above. Or quickly skim the notes below. In addition, the download can be used as a template. Feel free to replace the content with your own if you need a quick interactive module.
Use Multiple Layouts
Use as many layouts as you need to build your course. In this template I have two layouts. One layout is for the instructions and feedback; and the other layout for the interaction.
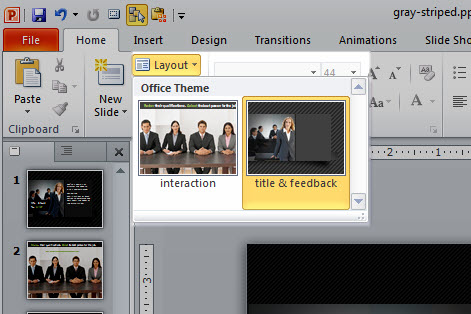
As a rule of thumb, once I get three or more slides with the same information, I try to put as much as I can on the master slide so it’s easier to edit and maintain. When you build your slides, try to determine what’s persistent and then add as much of the persistent content to the master slide.
Use Slide Titles as Metadata
I like to move the titles in the master slide up and off the slide. This lets me use the title area as a way to describe the slide, but not have that content appear in the actual slide.

This comes in really handy when you’re creating interactive branches and using PowerPoint’s hyperlinking because the titles of the slide are easy see. Don’t be afraid to add a lot of descriptive content to the slide title.
Add Hyperlinks to the Master Slide
In this interaction, we’re working with a single image that has multiple hyperlinks. Since we’re using the same master slide for all five slides, it makes sense to add the hyperlink to the master slide. That means I only add them once and they’re easy to edit.
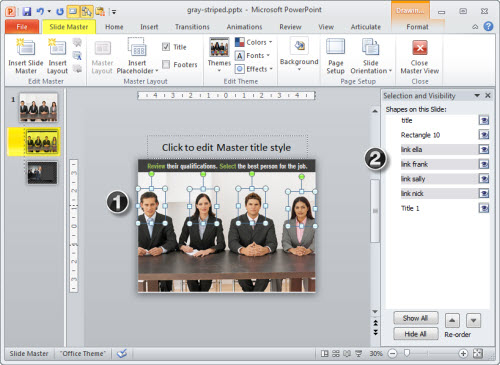
- Use transparent shapes for the hyperlinks (1).
- Title the hyperlinks so that you know where they go (2).
Create Shapes for Hyperlinks
You can add a hyperlink to any object in PowerPoint. However, if you look at the object on the slide, there’s no way of knowing which ones have links or not. Come back to a course three weeks later and you’ll have to spend a lot of time trying to remember which objects have links and where they go.
That’s why I like to create a shape just for the links. I add the link to the shape and then in the selection pane I title the shape as a link and where it goes. This makes reviewing the slide’s links super easy.
Bonus tip: CTRL+K opens the hyperlink window.
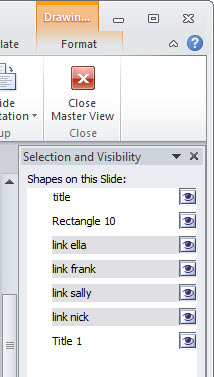
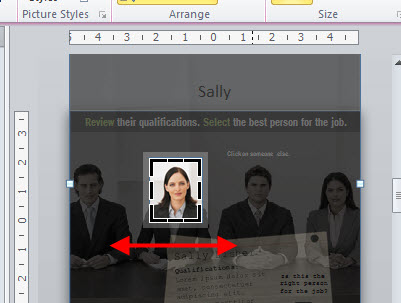
Title Objects on the Slide
In the image above I show an example of titled hyperlinks. And in the image below I show titled objects on the slide.
It’s a good habit to title objects on the slide. The most obvious reason is that you know what each object is and what it does based on how you title it.
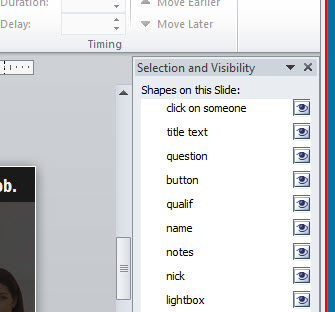
The other reason is that when you leave the course and come back a while later, you’ll find it a lot easier to orient yourself to what’s there. That’s a big time saver, especially if you hand the course off to someone else to maintain.
The Cropping Tool is Your Friend
In this template, I added the image of the four people on the master slide. I created a new slide and applied the master layout. Then I pasted a copy of the image on the slide itself.
From there I was able to use the crop feature to crop to the person’s head and add the image frame.
I duplicated the first slide for each additional character. Then selected the head image (see above) and opened the cropping tool. All I had to do was move the crop box to the new head and all of the same formatting was applied.
Graphic Creation Tips
One of the best parts of PowerPoint is that you can create your own graphics by combining the shape formatting with layered objects.
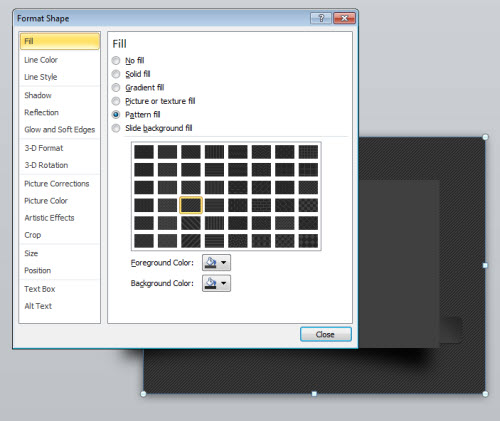
I created a pattern background for the slide to add a little depth and visual interest. Instead of adding it to the background, I put a shape on the slide then applied the pattern fill to the shape. This gives me the flexibility to manipulate the background.
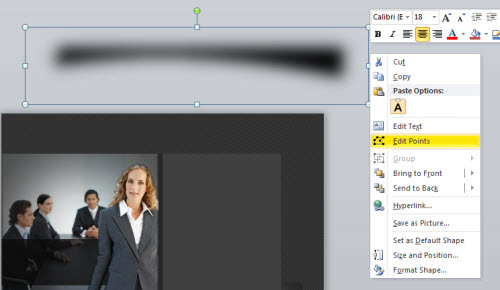
The drop shadow under the box is a rectangle that is semitransparent and uses a soft edge. Use the edit points to create a pull away shadow for more depth. Here’s a tutorial that shows how to create that type of shadow.

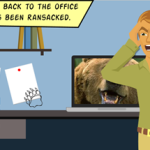
Layer images for more effect. In this example, I started with an office image. To make it more interesting, I pulled the woman out of the image and added a lighting effect in the corner. I also added a shape to use as a text box.
In the case of the woman in front of the table, I start with the original image of the woman in the meeting room at the desk (1). Then I added a spotlight shape on top of the original
image to create a corner shadow (2). I added the semitransparent rectangle as a content holder for my title text (3).
Finally, I duplicated the image and isolated the woman by cutting out the background. Then I added the isolated woman back on top of the image. This pulls her out of the original image and puts her on top of the text box. This is a simple technique that helps create a focal point.
As you can see PowerPoint’s freeform environment makes it easy to create your own graphic effects.
Even if you don’t build the same type of interaction in PowerPoint, these production tips are generally the same ones you use to build any interactive elearning courses in PowerPoint.
Events
- Everyday. Check out the weekly training webinars to learn more about Rise, Storyline, and instructional design.
Free E-Learning Resources
 |
 |
 |
|
Want to learn more? Check out these articles and free resources in the community. |
Here’s a great job board for e-learning, instructional design, and training jobs |
Participate in the weekly e-learning challenges to sharpen your skills |
 |
 |
 |
|
Get your free PowerPoint templates and free graphics & stock images. |
Lots of cool e-learning examples to check out and find inspiration. |
Getting Started? This e-learning 101 series and the free e-books will help. |
You might also like:
23 responses to “How to Create an Interactive PowerPoint Elearning Module”
Suggest that people leverage the rule of thirds where they can. This way people’s eyes are drawn to the spot or spots that are most relevant . This doesn’t completely jive with most typical navigation setups but it can help help when designing the central section of course content
Mike
Great article. Actually learned several things while going through the steps and the demonstration slides. I’m still trying to figure out how to create the spotlighted transparent box you used in the last section (2) for the corner shadow effect.
Thanks Tom, just found it after I pasted your box into a blank document and viewed properties. Looking forward to your workshop later this month in Boston.
What did you used to create the tutorial? Articulate?
And what did you use to create the vidéos?
Thanks Tom! But now I really want to know how you made that tutorial. Very, very cool. Was that done in Storyline?
Hi Tom,
Brilliant tutorial! You really make Powerpoint come to life – my younger colleagues keep dismissing the software in favour of their Apple alternative, but you continually show what can be achieved with a little care and forethought.
Many thanks.
Hi Tom and Kia Ora from New Zealand
Really enjoyed the tutorial, particularly the use of titling objects and hyper-linking from the master slide. I didn’t think you could do that. So big ups on that.
Is the drag and drop capability for the menu buttons from the opening slide a feature of Storyline only, or can you also do it in Articulate Presenter – if so how?
Cheers
Keith
[…] How to Create an Interactive PowerPoint Elearning Module In a recent post we looked at ways to build interactive elearning even if you’re using PowerPoint to build your courses. One of the demos I shared prompted lots of questions. <b>Qu’est-ce qu’apprendre à l’ère d’Internet ? </b>Comment comprendre ce qui change et quels sont les invariants du savoir, du comprendre, du partage ? […]
I have to tell you how much I enjoy your Blog and all the valuable information you make available to us. I am always getting great ideas and from your articles. I love the skin that you have below… is it available under Downloads?
[…] How to Create an Interactive PowerPoint Elearning Module In a recent post we looked at ways to build interactive elearning even if you’re using PowerPoint to build your courses. 3 Creative Ways to Use Engage Labeled Graphics – Articulate – Word of Mouth Blog The Engage Labeled Graphic is like the Swiss Army knife of Engage interactions. During the year I conduct dozens of elearning workshops. […]
Tom,
You ALWAYS deliver excellent content! Every single time I watch your tutorials, I learn something new that makes my life easier. Thank you!
PS. I’ve been very happy with Articulate since 2009, but the drag and drop feature of your first slide makes me want Storyline…nice!
[…] How to Create an Interactive PPT eLearning Module […]
Thanks fr sharing this useful article! I think that using Powerpoints for e-learning is a simple yet great idea!
[…] MS Powerpoint If you work in learning and don’t know what Powerpoint is I would be a little surprised. For some, it has become the ubiquitous tool to lead any group session. For others, it is a design tool to create elearning. For me, I prefer to use it as little as possible but it is an essential tool to help me do my job. I’ve never enjoyed clip art or bullet points and it suits the edutainment style of learning facilitation I highlighted previously. I use it more in creating elearning solutions as it works as a great image manipulation tool and is available on almost every platform. If you want to see how well it can be used, have a quick look at Tom Kuhlmann’s blog. […]
[…] How to Create an Interactive PowerPoint Elearning Module […]
[…] a recent post, I built a drag and drop video player where you can select and drag a video title to load a video tutorial. I got lots of questions about […]
[…] then you know that you’ll be using the master slides quite a bit. There’s a good review of how the slide master works with interactive content in this […]
Tom,
Thanks for the great eLearning powerpoint tips! What training tips do you have planned for 2013?
Gloria


0
comments