


This is really great Tom! I don’t have Photoshop here at work so it is good to know that I can use Powerpoint to edit pictures. Now, I am no longer have to wait for my colleague to finish using his/her computer. Thanks Tom!
3 Tutorials to Help You Get More Out of PowerPoint’s Image Editing
February 21st, 2012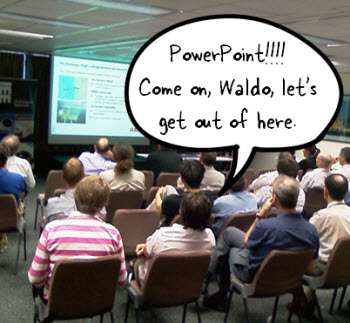
I know it’s hard to believe, but apparently, there are many people who don’t like PowerPoint. Obviously, there are a lot of bad presentations created with PowerPoint, but it seems to me the blame rests on the shoulders of the presenter and not the tool. Besides, PowerPoint’s a versatile tool that’s used for more than bad presentations.
Personally, I think PowerPoint’s one of the single best multimedia applications. The secret is to look at PowerPoint in a different way. And once you do that you’ll see that it offers an assortment of capabilities.
I just returned from the Training 2012 Conference in Atlanta where I presented on some PowerPoint tips and tricks. For those of you who couldn’t attend, I’ve included links to PowerPoint resources that I’ve shared in previous sessions.

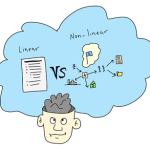
- Don’t Let the Experts Tell You PowerPoint Sucks
- Become a PowerPoint 2010 Rock Star
- Use PowerPoint for More Than Boring Presentations
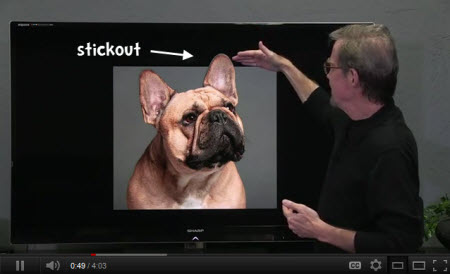
Recently, I was sharing how PowerPoint makes a good image editor. After the session, someone asked about this video where you learn to create a stickout effect that lets the image stick outside the box. It’s a basic cropping technique that allows you to open up the page and add more visual interest to the screen. The person wanted to know how to do that in PowerPoint.
I like this question for a few reasons. It lets me demonstrate how PowerPoint can be used to edit images. And it helps teach more about the features and capabilities of PowerPoint in general. Even if you don’t use PowerPoint to do this on a regular basis, practicing this technique is an excellent way to learn more about PowerPoint’s features.
So let’s look at a few ways to create the “stickout” effect in PowerPoint.
PowerPoint Tutorial 1
Click here to view tutorial 1.
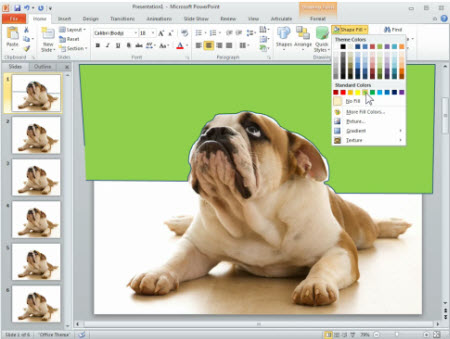
PowerPoint 2010 has a background removal feature. However, if you’re using older versions of PowerPoint you can still get the stickout effect. This tutorial shows how.
PowerPoint Tutorial 2
Click here to view tutorial 2.
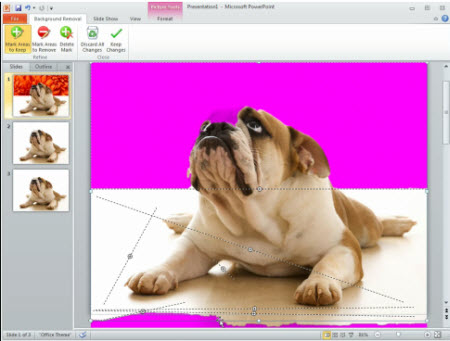
In this tutorial you learn to use PowerPoint 2010’s background removal feature to create the stickout effect.
PowerPoint Tutorial 3
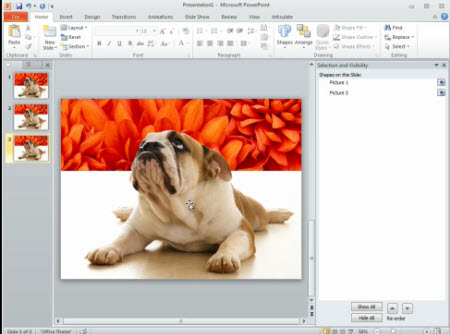
This tutorial combines the background removal feature with a duplicate image. Learning to work with layers and multiple images is definitely going to open possibilities when editing images in PowerPoint.
Consolidated PowerPoint Tutorials
I know some of you can’t access the YouTube tutorials at work, so I downloaded the video files and used them to test a drag and drop video player idea in Articulate Storyline. You drag the DVD icon to the orange box and it loads the video. The cool thing is that it only took a few minutes to build the functionality.
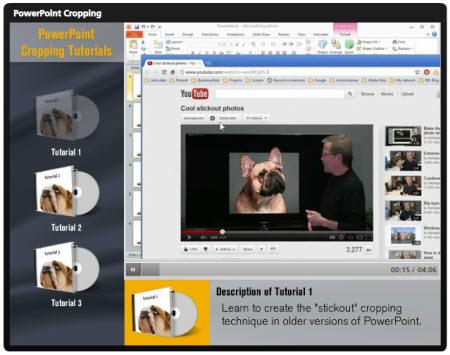
Click here to view the three PowerPoint tutorials.
You may never need to use this specific image editing technique in PowerPoint, but going through these tutorials will help you learn more about PowerPoint’s features and develop a greater appreciation for the application’s capabilities.
Events
- Everyday. Check out the weekly training webinars to learn more about Rise, Storyline, and instructional design.
Free E-Learning Resources
 |
 |
 |
|
Want to learn more? Check out these articles and free resources in the community. |
Here’s a great job board for e-learning, instructional design, and training jobs |
Participate in the weekly e-learning challenges to sharpen your skills |
 |
 |
 |
|
Get your free PowerPoint templates and free graphics & stock images. |
Lots of cool e-learning examples to check out and find inspiration. |
Getting Started? This e-learning 101 series and the free e-books will help. |
You might also like:
24 responses to “3 Tutorials to Help You Get More Out of PowerPoint’s Image Editing”
Tom, you have done it again. You got the creative juices flowing. My questions is how did you create the consolidated tutorial skin. I am really interested in that. Please share.
Yes, please share how to create a skin similar to the one you used for the three tutorial videos in the future. I really like that concept.
[…] Read the original post: 3 Tutorials to Help You Get More Out of PowerPoint’s Image Editing » The Rapid eLearning Blog […]
Tom Cool Man … please, please, please stop teasing us with Storyline.
Oh yes!! This is SO fantastic!!
I am all geeked up about your drag and drop to launch videos and the storyline product as well! If you have a previous post of how to create it in Presenter, please share:)
Thanks, Tom. Great tips. I´ve used Gimp to crop, but PPT is better.
this is so brilliant!! im going to try this ASAP!!
Like the way Storyline takes over from the blog topic! I too was looking at the way it was presented rather than the tutorial, and thinking: that’s gotta be Storyline. I am beta testing too, and it’s really great.
Seems this post got more interest in Storyline than your PowerPoint tips. 🙂
The overall message in this post (aside from the attraction to Storyline) is what you mentioned early on – Most often it’s the presenter and not the tool and with PowerPoint 2007 and 2010 it is one of the easiest and simplest to learn when it comes to manipulating images. Doesn’t have all the bells & whistles like Photoshop, but it allows designers to stay within one tool and get a really quality output.
Good stuff as always!
[…] 3 Tutorials to Help You Get More Out of PowerPoint’s Image Editing, another great post from Tom at The Rapid eLearning Blog. […]
[…] 3 Tutorials to Help You Get More Out of PowerPoint’s Image Editing » The Rapid eLearning Blog I know it’s hard to believe, but apparently there are many people who don’t like PowerPoint. Obviously there are a lot of bad presentations created with PowerPoint, but it seems to me the blame rests on the shoulders of the presenter and not the tool. Besides, PowerPoint’s a versatile tool that’s used for more than bad presentations. Personally, I think PowerPoint’s one of the single best multimedia applications. […]
Thanks Tom. Its really great information and tips this will be helpful for learners also.
[…] 3 Tutorials to Help You Get More Out of PowerPoint’s Image Editing […]
Thanks Tom. The rule of thumb is that the average user uses about 20% of the capabilities of most Microsoft products. It’s probably quite a bit higher than this for most other products, including yours? Back to my PowerPoint…
Thanks for the tips on Power Point. It seems to a much used tool that needs more understanding.
Great post with all these useful tips on power point it will be really helpful for me when I am working on client machines were we don’t have Photoshop all the time. Thanks for sharing.
Thanks for those wonderful tips, I’m sure its’s gonna improve my Powerpoint making skills a lot !!
[…] 3 Tutorials to Help You Get More Out of PowerPoint’s Image Editing » The Rapid eLearning Blog I just returned from the Training 2012 Conference in Atlanta where I presented on some PowerPoint tips and tricks. For those of you who couldn’t attend, I’ve included links to PowerPoint resources that I’ve shared in previous sessions. Personally, I think PowerPoint’s one of the single best multimedia applications. The secret is to look at PowerPoint in a different way. […]
[…] I just returned from the Training 2012 Conference in Atlanta where I presented on some PowerPoint tips and tricks. For those of you who couldn’t attend, I’ve included links to PowerPoint resources that I’ve shared in previous sessions. Personally, I think PowerPoint’s one of the single best multimedia applications. 3 Tutorials to Help You Get More Out of PowerPoint’s Image Editing » The Rapid eLearning Blog […]
[…] I just returned from the Training 2012 Conference in Atlanta where I presented on some PowerPoint tips and tricks. For those of you who couldn’t attend, I’ve included links to PowerPoint resources that I’ve shared in previous sessions. Personally, I think PowerPoint’s one of the single best multimedia applications. 3 Tutorials to Help You Get More Out of PowerPoint’s Image Editing » The Rapid eLearning Blog […]


0
comments