


Storyline 3: Adjustable Accessibility Settings
Article Last Updated
This article applies to:
The goal of an accessible design is to give all learners a compelling, enjoyable experience, regardless of their abilities. Going a step further, the ultimate accessible design gives learners the power to personalize their own learning experiences according to their needs and preferences. Storyline 3 makes strides toward that customized experience with new accessibility controls that allow learners to turn accessible text on or off and toggle keyboard shortcuts.
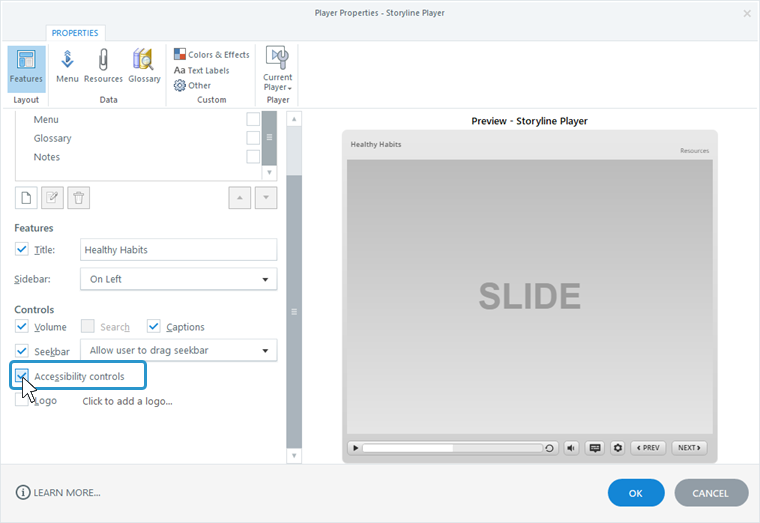
Accessibility controls allow learners to personalize their learning experience.
Letting Learners Personalize Their Experience
Starting with the April 2021 update, the Storyline 3 player properties have a new optional setting: Accessibility controls. When you enable it, learners see a gear icon on the player, as shown above. It gives learners toggle switches for the following accessibility controls:
- Accessible text: Learners can switch between high-fidelity SVG text and accessible HTML text. When accessible text is enabled, learners can use custom stylesheets or browser extensions to change how text displays. For example, they might swap fonts, enlarge the font size, or increase the line spacing.
- Keyboard shortcuts: This switch appears when learners view the course on a laptop or desktop computer. Keyboard shortcuts are enabled by default, but learners can turn them off if they conflict with shortcuts in browser extensions or other apps.
Author's Decisions
As an author, there are several design choices you can make, depending on your goals. Let's walk through each decision, one at a time.
1. Give Learners Access to the Accessibility Settings Menu
To give learners access to the accessibility settings menu (i.e., the gear icon on the player), open your player properties and mark the Accessibility controls box. It's checked by default for new projects to encourage authors to have an accessibility-first mindset. Starting with the April 2021 update, the box is unchecked by default for existing projects and saved custom players.
2. Let Learners Toggle Accessible Text On and Off
You must use modern text to give learners the option of accessible text. Go to the Design tab on the ribbon, click Fonts, and make sure Use Modern Text is selected.
3. Turn On the Accessible Text Switch by Default
The "Accessible text" option is turned off by default. If you'd prefer to start with it turned on, open the variables manager and set the Player.AccessibleText variable to True.
Learner's Choices
When the accessibility settings menu (the gear icon) is available, learners can:
- Turn accessible text on or off. When it's turned on, learners can use custom stylesheets or browser extensions to swap fonts, enlarge the font size, increase the line spacing, and more to make content easier to read.
- Toggle keyboard shortcuts on or off. They're turned on by default, making it easy to perform the following actions, no matter where the keyboard focus is currently located.
Action
Shortcut Toggle accessible text
Ctrl+Alt+T
Mute/unmute audio
Ctrl+Alt+M
Toggle closed captions
Ctrl+Alt+C
Replay the slide
Ctrl+Alt+R
Play/pause
Ctrl+Alt+P
Previous slide
Ctrl+Alt+, (comma)
Next slide
Ctrl+Alt+. (period)
Submit slide
Ctrl+Alt+S