


Rise 360: How to Customize Text Labels
Article Last Updated
This article applies to:
Make built-in course elements, such as buttons and lesson headers, say what you want them to say by customizing the default text labels in Rise 360. You can edit Rise 360 labels using the on-screen label editor, or you can export a label set, customize it with an XLIFF editor, and import it back into Rise 360. You’ll learn both methods in this lesson.
Customize Your Labels Using the On-Screen Editor
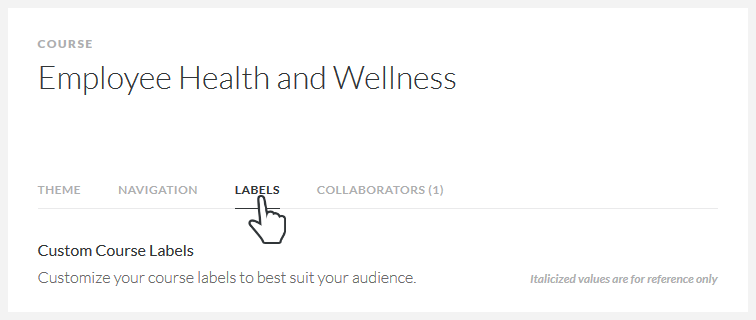
Step 1: Open the Label Editor
Open the course you want to edit, then click Settings in the upper right corner of the screen and select the Labels tab.
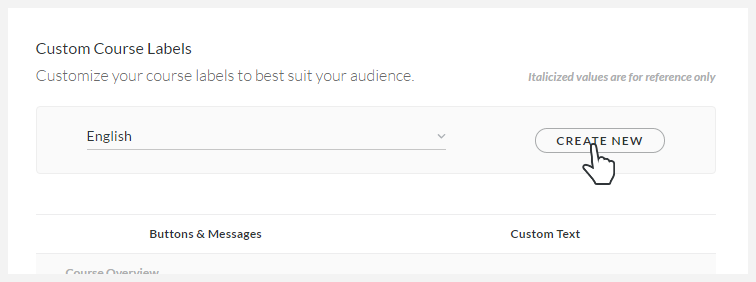
Step 2: Choose a Label Set or Create a New One
To switch all the text labels to a different language or a custom label set, use the drop-down list at the top of the editor to make a selection.
Or, to customize individual text labels, click Create New at the top of the editor to create a new set of text labels, enter a name for your custom labels when prompted, and click OK.
Note: If you select a language from the drop-down list or import text labels for one of the supported languages, it will also localize your video player.
Tip: Create a New Label Set When You Need to Customize Text Labels

When you edit text labels, the changes affect all your Rise 360 courses that use the same label set.

For example, if you edit the built-in English label set, every course that uses that label set will automatically get the same changes.

We recommend creating a new label set when you need to customize text labels so you won’t accidentally change the labels in other Rise 360 courses.

To change the name of a label set, just hover over it in the drop-down list and click the pencil icon that appears.

To delete a label set, hover over it and click the garbage bin icon.
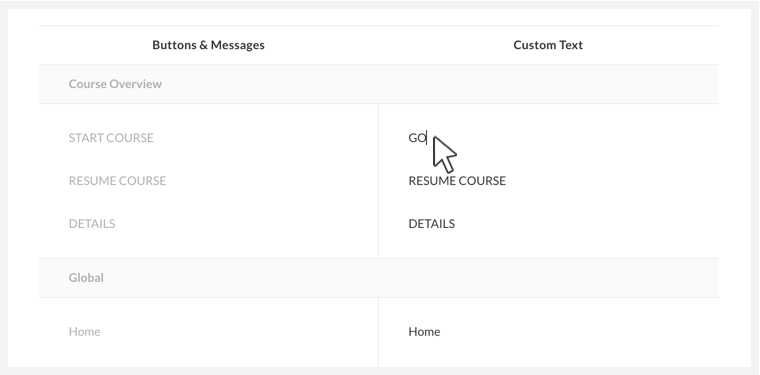
Step 3: Customize Individual Labels
Enter new text in the Custom Text column for each label you want to change.

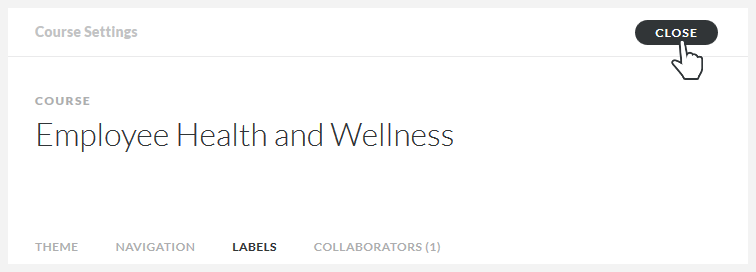
Step 4: Close the Label Editor
When you’re done, click Close in the upper right corner to return to your course outline.
Export, Customize, and Import XLIFF Label Sets
This is a great option if you use professional translators, an online translation service, or a computer program to localize content. Export a label set, customize it, then import it back into Rise 360.
Step 1: Export
Open the course you want to edit, then click Settings in the upper right corner of the screen and select the Labels tab.
Go to the drop-down list at the top of the label editor, hover over a label set, then click the download icon to export the label set to your computer.
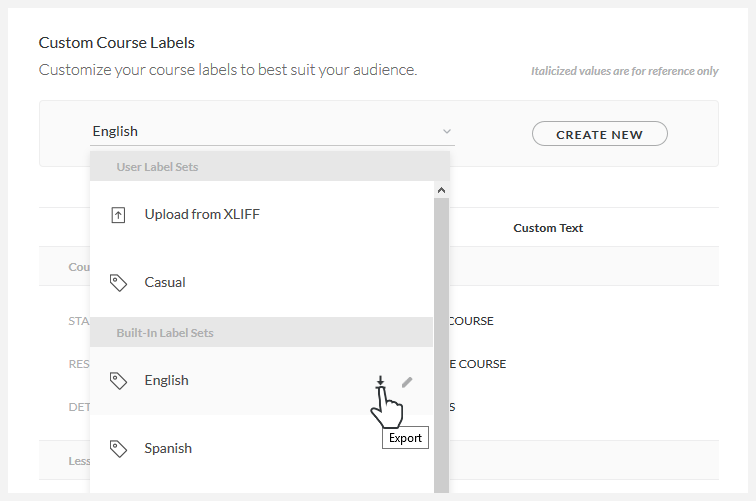
Tip: Rise 360 Uses XLIFF 1.2

Rise 360 exports XLIFF files, which are special XML files commonly used for translating content.

Rise 360 uses XLIFF version 1.2.
Step 2: Customize
After exporting a label set, use a web app, computer program, or professional translation service to edit your XLIFF file.
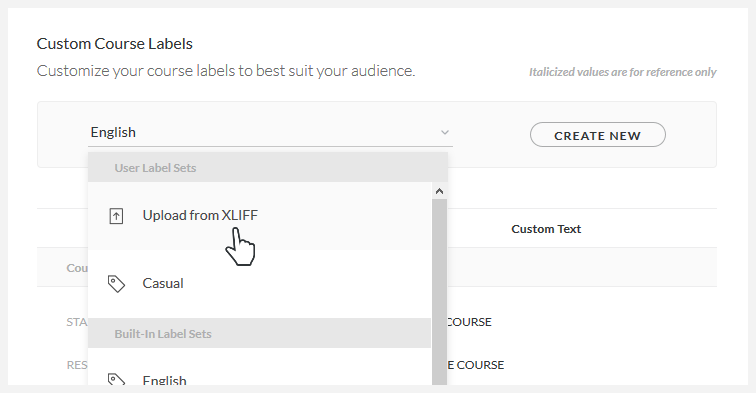
Step 3: Import
To import your custom labels back into Rise 360, go to the drop-down list at the top of the label editor, click Upload from XLIFF, and browse to the modified label set on your computer.
When prompted, give your custom label set a name and click OK.
Your new label set will appear in the drop-down list under User Label Sets, and it’ll be available in any Rise 360 course you build.
Step 4: Close the Label Editor
When you’re done, click Close in the upper right corner to return to your course outline.