The Rapid Elearning Blog

Articulate Rapid E-Learning Blog - How to create your own graphics and illustrations in PowerPoint

Despite all of the whining about PowerPoint, I find it an effective application for much of my online training and graphic design work. There aren’t many applications more diverse. And it’s what I highlighted in this post on why PowerPoint doesn’t suck.

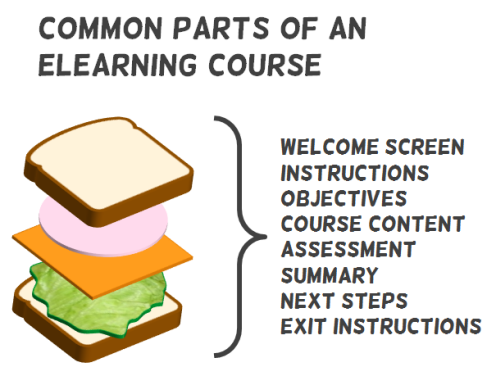
In that post I shared how I use PowerPoint to create my own illustrations and used the deconstructed sandwich graphic below as an example.

Articulate Rapid E-Learning Blog - create custom graphics in PowerPoint for online traininig

I had a few people email and ask how I created the image. So today’s post is a tutorial on creating illustrations for your online training courses.

How to Build Illustrations in PowerPoint

In my elearning workshops I share ideas on creating a starting template for your online courses. I like to use the sandwich graphic as we discuss deconstructing the core parts of a course. I saw a similar graphic online and decided to try my hand at creating it myself in PowerPoint.

Below is a tutorial that shows how I built the sandwich illustration. Here are the general steps:

  • To create the bread shape, I combined two shapes in PowerPoint. I filled it with a bread-like color and made the outline color brown for the crust.
  • The meat and cheese are just regular shapes filled with the appropriate color.
  • The lettuce is a hand-drawn shape. It didn’t look right filled with green, so I filled it with an image of lettuce.
  • Then I applied a rotation effect to all of the shapes to give them that 3D look.

You can get more detail from the tutorial below.

Articulate Rapid E-Learning Blog - how to create custom illustrations and graphics in PowerPoint for elearning design

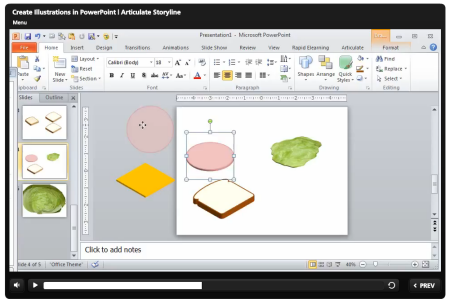
Click here to view the tutorial.

Forget the Sandwich! These Tips Are Meant to Teach You More About PowerPoint

When I share these PowerPoint illustration tips I don’t expect that every blog reader is going to go out and find ways to use the sandwich graphic for elearning. Instead, my goal is to get you to rethink PowerPoint and see it’s capabilities in a new light. And I hope to inspire you to practice some of these tutorials in order to learn more about PowerPoint’s features.

You may never need to build a sandwich illustration, but you’ll definitely benefit from practicing the techniques so that when you need a custom graphic you have the skill to try building one yourself.

Articulate Rapid E-Learning Blog - how people learn

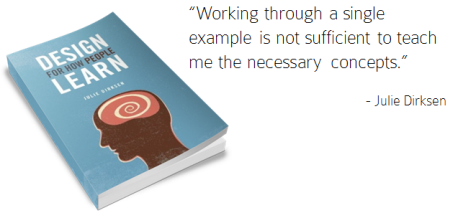
It’s a point that Julie Dirksen makes in her excellent book, Design for How People Learn. She referenced the blog post where I share how to create the envelope illustration in PowerPoint. In the book she says that just following the tutorial to learn to build the illustration isn’t enough because the goal isn’t to build that particular illustration. Instead it’s to learn to build illustrations using PowerPoint. And that won’t happen when you build a single icon. It requires more than step-by-step instructions.

Articulate Rapid E-Learning Blog - example of a graphic created for a practice elearning tutorial

The same goes for the sandwich illustration. The goal isn’t to build the sandwich illustration. Hopefully you’ll learn to appreciate the capabilities of PowerPoint, see the illustrations as distinct shapes, and then practice building your own as you need them.

With enough practice you’ll feel confident to build (or at least attempt it) the illustrations and graphics you need. If you do create a custom illustration, be sure to share it with us. I’d love to see what you create.

Events

Free E-Learning Resources

Want to learn more? Check out these articles and free resources in the community.

Here’s a great job board for e-learning, instructional design, and training jobs

Participate in the weekly e-learning challenges to sharpen your skills

Get your free PowerPoint templates and free graphics & stock images.

Lots of cool e-learning examples to check out and find inspiration.

Getting Started? This e-learning 101 series and the free e-books will help.


16 responses to “How to Create Your Own Illustrated Graphics in PowerPoint”

I agree wholeheartedly with this. Powerpoint gets a bad press but it is the software I turn to first for a lot of things now. Just start with a blank screen. I produced our course catalogue in powerpoint and it outputs to pdf complete with hyperlinks. I only started it in Powerpoint to draft it, but then it worked fine so I stayed put. Simple but effective and easy to update.

I am slowly building confidence with graphics (since I’d be the first to say I can’t draw), but the fashion in design these days is quite simple anyway so it is much easier to do things yourself and get away with it. It is more satisfying, gives you more control and makes you think a lot more about what you are doing and why.

As for your blogs, they are great and personally I think for creative things then just one example can be enough to kick the cogs into action… all it needs is an encouragement to explore.

July 9th, 2013

Major learning for me: There’s a UNION tool in PowerPoint! Even in 2010. Find it odd that is does not show up on any of the standard tabs, but it is on my Quick Access Toolbar now.

Tom, you are such a good teacher. Thanks!

I love the flexibility of Power Point–but need help! I cannot complete the “shape union” on my mac. Am I missing something?

@RMB: unfortunately the Mac version of PPT doesn’t have the same features 🙁

@RMB – If you’re using PowerPoint 2011 on the Mac, you can use the shape tools. Here’s a quick demo: http://www.youtube.com/watch?v=k6PM_6XfiFw

@David: cool, didn’t realize that was there…of course I don’t have a Mac.

July 10th, 2013

I’d just like to say that I love your single item tutorials/ demonstrations. I work through it once, so I’m aware the technique is possible and (inevitably) a few weeks later when I have forgotten *how* to do it, I have enough information to JFGI.

My job is so different to yours that there is no value in copying your content. But copying^H^H^H^H^H^H^H learning from your ideas? That’s a whole different thing and I love that you share them here!

Thanks for another great tutorial. I remember seeing this sandwich graphic before and wondering how you did it. The great thing about these tutorials and Storyline is how it makes you find new creative ways to…create.

I started the tutorial, then stopped it a couple minutes in when I got the general idea of how you created it, then went and created it all myself before watching the rest. Sometimes you just need a little nudge in the right direction and then the ideas flow.

Thanks Tom! Had a great time hanging with you guys in London!

Jeff

David-You are my hero!!! Thanks!!! I have tried this in many different ways and have never succeeded–now I can make that slice of bread and many other custom shapes!

July 10th, 2013

Among many other things, I use PPT to mock up room arrangements for different live classes I do. I’ve built tables, chairs, a cart w/ LCD projector, even a bed and wheel chair.

Here’s your homework: Tom showed awhile back how to make a laptop in PPT. Make a mouse to go w/ it.

–Allen

.

@RMB – Glad that worked. I only wish the pc version would do a better job at promoting those features in the main ribbon.

July 12th, 2013

Great tutorial! Like Sarah, I find I use PPT for more things than creating slides. I find myself doing storyboards more and more with it. Also creating images using the “Save as picture” feature.

Bummer, however, as I have PPT 2007 which does not have the Union tool. Tried getting upgraded but IT folks said “No!”

You mentioned adding the “Rapid ELearning” tab to PowerPoint. You said you had covered that earlier. I’ve searched and cannot find that information. Could you please repeat it!

I love your tutorials!! (I love Storyline!) They are always helpful and I love trying the new things that you demonstrate.

Very helpful VoD! thank you!

July 16th, 2013

Wow! Didn’t know you could combine shapes like this! Thanks a million for this tip and easy tutorial. I played with this to practice and found it very simple to do. I can see so many opportunities to use many of the combine shapes feature. Thanks Tom!