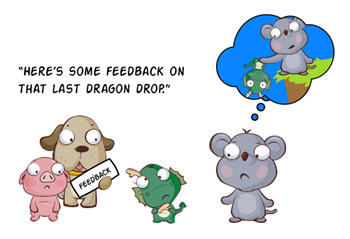
The Rapid Elearning Blog

Archive for July, 2014


Articulate Rapid E-Learning Blog - provide effective feedback through decisions

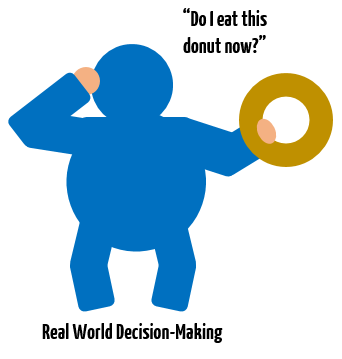
Good online courses provide feedback throughout the course. The trick is making sure that it is meaningful and effective feedback.

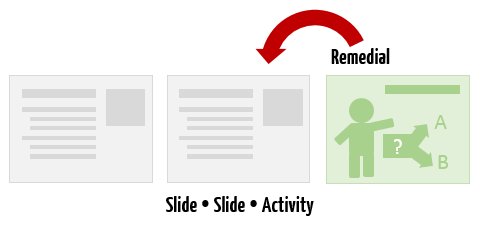
Here’s an approach that’s typical of a lot of elearning courses. We provide a few screens of information then a quick knowledge check to see what they know. Then provide some more screens of information with another quick knowledge check. At the end of it all, we have them complete a multiple choice quiz.

Articulate Rapid E-Learning Blog - slide, slide, quiz basic elearning

That’s how many of us learned to build elearning courses. I call it the “slide-slide-quiz” technique. It’s not necessarily a bad process depending on the context of the course, but often it’s just a massive information dump with screen after screen of bullet points and simplistic quiz questions.

And then when it comes to feedback it’s usually not very effective because the knowledge checks and quizzes tend to be simple and at best provide basic incorrect and correct prompts. However, life isn’t like that. It’s a lot more nuanced and right and wrong decisions have meaningful consequences to what we do. Which means that simple correct and incorrect prompts may not be the most effective feedback you can provide.

Here are a few tips on providing more meaningful and effective feedback.

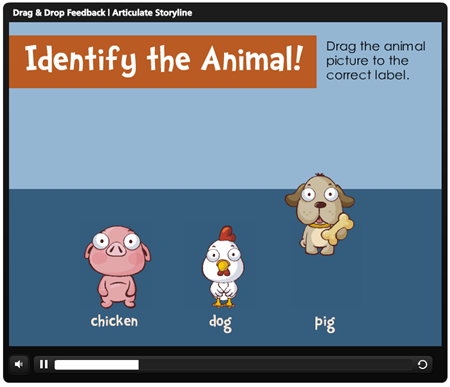
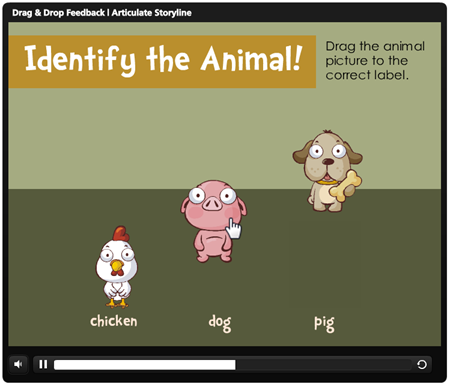
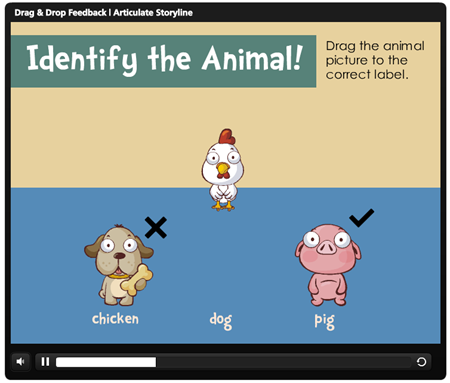
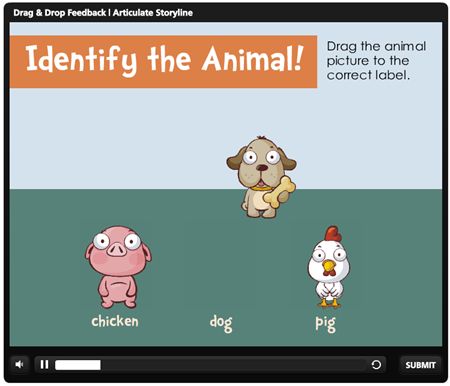
Replaces Quiz Questions with Activities to Create Effective Feedback

You can still use the slide-slide-quiz technique. But replace the quiz question with a meaningful activity. The key with the activity is that you’re not just testing knowledge. Instead you get them to apply what they learned in a relevant context.

This lets you ascertain their current level of understanding and the learner can feel confident that they’re learning and moving forward. It’s also a way of directing them to remedial content sooner than later.

Articulate Rapid E-Learning Blog - create practice activities for effective feedback

Real World Consequences Provide Effective Feedback

With performance-based courses I like to place the learner in a position that mirrors what they encounter in the real world. Most likely they’re not sitting around reading manuals and bullet point slides. Instead they interact with people and the work environment making decisions that produce all sorts of consequences.

Articulate Rapid E-Learning Blog - practice activities should mirro real world context

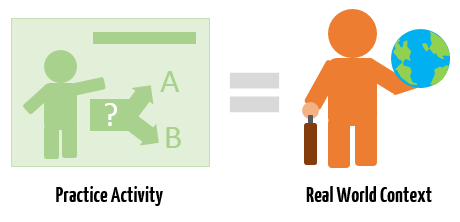
So the first step is to frame the learning experience in a real world context where they make meaningful decisions. And then the next step is to provide feedback that shows the impact of the decisions and actions a person makes. In the real world there are consequences to what we do and they tend to impact the world around us for good or bad. Build your feedback to reflect that type of consequence.

Make a good decision and sales go up or a customer relationship is repaired. However, making a poor decision costs the organization money or perhaps something like a work place injury.

Exaggerate the Consequences for Effective Feedback

Because it’s an online course you may have to amplify or over dramatize the activities, feedback and consequences. For example, in the real world an angry customer may leave the store if you make a wrong decision. Sure, you lost a potential sale, but odds are the company is not going to go bankrupt and most likely not even be aware of the lost sale.

Articulate Rapid E-Learning Blog - compress decisions to provide effective feedback

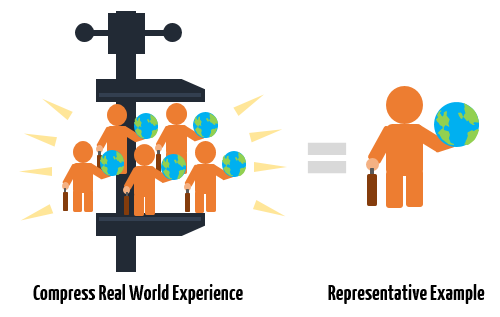
However, in an online training environment, you have to compress the events and exaggerate their impact. Compressing also allows more decisions to be made than might happen in a real world environment. And exaggerating the consequence amplifies the impact of the decisions made.

As an aside, exaggerated consequences can also be an effective way to bring humor into the course.

If you’re building simple, information-based courses with no performance impact you can probably get away with simple knowledge checks and minimal feedback. However, if your course is designed to change behaviors and improve performance then you’ll need to find ways to provide meaningful and effective feedback.

What are some ways you provide effective feedback in your elearning courses?

Events

Free E-Learning Resources

Want to learn more? Check out these articles and free resources in the community.

Here’s a great job board for e-learning, instructional design, and training jobs

Participate in the weekly e-learning challenges to sharpen your skills

Get your free PowerPoint templates and free graphics & stock images.

Lots of cool e-learning examples to check out and find inspiration.

Getting Started? This e-learning 101 series and the free e-books will help.


Articulate Rapid E-Learning Blog - create your own characters for online training

In this blog we’ve learned how to create custom characters with clip art. We’ve also learned to create our own illustrated characters in PowerPoint. And today, we’ll learn another way to create custom characters.

A few months ago, Mike Taylor, one of our community managers had a great post on how to create your own graphics for your online training courses. It was one of those posts so good that I want to make sure it didn’t slip through the cracks.

You can watch his tutorial below to see how easy it is to create custom characters using simple shapes.

Click here to view how to create custom characters.

Free Downloads

Here are some free downloads to help you get started:

  • Here’s the PowerPoint file that Mike used. You can use it to follow along with what he shows or deconstruct the images and build your own.
  • Here are the individual image files if you want to use the characters Mike created. I isolated the characters and saved them in the .png format. If you want to edit them, you’ll need to use Mike’s file. However, I recommend creating your own and working from those. This way you learn to make your own and you always have quick access to the starter characters.

Articulate Rapid E-Learning Blog - download these custom characters for online training

How Would You Use These Custom Characters?

These types of characters work great for safety training and for procedural training where you have to show step-by-step sequences. They’re easy to understand and easy to create. The key is to keep them simple.

Articulate Rapid E-Learning Blog - use custom characters to create online training

Can you use these characters? How would you use them in your own training? What characters and industries would you add?

Your next step is to watch the tutorial and practice building your own characters. This way when you need a custom character you can quickly make it. If you do create your own characters, please share with the rest of us so we can see what you did.

Events

Free E-Learning Resources

Want to learn more? Check out these articles and free resources in the community.

Here’s a great job board for e-learning, instructional design, and training jobs

Participate in the weekly e-learning challenges to sharpen your skills

Get your free PowerPoint templates and free graphics & stock images.

Lots of cool e-learning examples to check out and find inspiration.

Getting Started? This e-learning 101 series and the free e-books will help.


Articulate Rapid E-Learning Blog - drag and drop feedback

Interactive elearning is all the rage and building drag and drop interactions is getting easier than ever. Drag and drop interactions are great because they get the learners to interact with the screen objects and make decisions. The dragging of objects is also usually more engaging than the more common click interactions.

Here are some previous blog posts on drag and drop interactions for those less experienced:

Since many of you are just getting started with elearning and creating drag and drop interactions, I thought we’d review a few ways to provide feedback to the learners as they interact with the screen using drag and drop interactions.

The assumption is that they are making a decision which requires that they drag an object to a specific location (we call that a drop target). Once the object is dropped on the target, they get some sort of feedback acknowledging what they did. That feedback can be immediate or require an additional action, like a submit button.

Drag and Drop Feedback: Snap to Target

The snap-to-target mechanism lets the user quickly know that the object has been delivered to an acceptable target. The snap feature also helps keep objects on the screen aligned so that everything looks pretty.

Articulate Rapid E-Learning Blog - drag and drop feedback example 1

Click here to see the drag and drop example.

I like the snap-to-target option because it lets the person know that they moved the object to a proper location. If you don’t use a snap-to-target the learner may make a correct decision but not have the object aligned enough to the target to register the placement of the object.

Drag and Drop Feedback: Return to Original Location

Many drag and drop interactions are tied to the quizzing feature of the authoring tool. In that case they have some sort of submit button or way to indicate the choice and track the results and, in turn, provide feedback.

There are plenty of times where you may just want them to have the drag interaction but not require the quizzing feature. But you do want to give them correct/incorrect feedback. A simple solution is to only allow correct responses and have incorrect responses return to their starting point.

Articulate Rapid E-Learning Blog - drag and drop feedback example 2

Click here to see the drag and drop example.

I like this option because they are easy to build and are great for quick knowledge checks. They’re also great to add at the forefront of a topic. For example, let the learner make some decisions and then provide immediate feedback. It helps them see how much they know before you dig in deeper.

Drag and Drop Feedback: Add Feedback to the Object

When an object is dropped in the correct area, have it change the way it looks. A common state change is to add a check or X mark on correct/incorrect choices. However any type of visual cue works. The key is that you are letting people know what’s right and wrong as they make their decisions.

Articulate Rapid E-Learning Blog - drag and drop feedback example 3

Click here to see the drag and drop example.

I like this because of the visual indications of correct and incorrect. It’s an elegant solution. It’s also helpful to add color cues. For example, red = wrong and green = right. That’s a better cue than a single color.

Drag and Drop Feedback: Feedback Box or Layer

Feedback boxes serve as gate screens. They stop the interaction and allow you to provide feedback. It’s common to have them sit on top of the content which creates space to add more content without taking up the interaction screen’s real estate.

Some people use the default feedback boxes (like I did) and others use layers or lightbox slides. You can also customize the default feedback which opens the doors to all sorts of creative ideas. It doesn’t really matter which you use. They key is using a gate to halt the interaction and give the learner time to process what’s going on.

Articulate Rapid E-Learning Blog - drag and drop feedback example 4

Click here to see the drag and drop example.

I like gate screens because they do delay the course. Sometimes we get so used to clicking and dragging and seeing all sorts of new content that we don’t always process it or have enough time to do so.

A gate screen helps slow things down a bit and lets the person regroup. Because it slows things down, you want to be sure that you’re using it at the right point. There’s nothing worse than using a gate screen where it isn’t needed and requiring a bunch of extra clicks. Actually, there probably are worse things, like falling into a pond full of piranhas with a slab of bacon strapped to your back. But you get my meaning.

There are a lot of ways to provide feedback in your courses when using drag and drop interactions. Hopefully these four help with your next course design. Let me ask you, when would you choose one of the methods above over the others?

Events

Free E-Learning Resources

Want to learn more? Check out these articles and free resources in the community.

Here’s a great job board for e-learning, instructional design, and training jobs

Participate in the weekly e-learning challenges to sharpen your skills

Get your free PowerPoint templates and free graphics & stock images.

Lots of cool e-learning examples to check out and find inspiration.

Getting Started? This e-learning 101 series and the free e-books will help.


Articulate Rapid E-Learning Blog - instructional techniques for effective online training

Effective online training involves more than just sharing information. It also requires the learner practice and apply what you’ve taught them.

Despite our best efforts many online courses are still mostly linear. As I’ve mentioned before, that’s probably fine for those annual compliance courses that aren’t tied to specific performance objectives. But if you want to build courses that are effective and engaging you need to focus on sound instructional design and the activities required to learn and prove understanding.

Effective Online Training Starts with the Tell, Show, & Do Technique

A common approach to online course design is to Tell, Show, and Do. It makes sense because it covers the basics.

  • Tell them what they need to know or provide context that is critical to what they need to learn. For new learners, the context is important and helps them understand where the learning fits in the big picture. Telling also allows you to speed things along and make acquisition of the information faster.
  • Show them so they can see what they are to do. This lets them see the proper sequence of events and allows you to fill in any gaps or answer questions they may have. One thing to keep in mind with showing is to focus on the positive action. Sometimes we’ll show a negative action as an example of how not to doing something, but that could end up being what the learner learns.
  •  Do the task lets the learner practice doing what you just showed them. The goal is to get the learner to practice and then apply what they learned in a real-world context. The application of the new skills can be part of the “Do” process or as an added component. For example, when I first started out my manager used to say that the instructor did the Tell & Show and the learner did the Do & Apply.

Articulate Rapid E-Learning Blog - tell, show, do for effective online training

The Tell, Show, and Do model is a common instructional technique because it lets you build context and demonstrate the desired performance. And in the end the learner gets to practice applying what they learned. What’s also good about this technique is that it nudges you away from the linear, click & read model that is so prevalent with a lot of online training.

Tell, Show, Do, Practice & Review to Build Effective Online Training

When I was training junior level instructional designers I liked to say “Tell, show, do! Then practice and review!” because it rhymed and was an easy mantra to remember the essential steps required in the learning process. It covers everything from providing the core information to debriefing the learning experience which is more involved than the more common Tell, Show, and Do technique above.

  • Tell them what is going to be taught and why so that you can build context. This helps them see the relevance and how it fits in their world.
  • Show them what they are going to do so that they can see what’s expected and you can address common questions and concerns during the demonstration.
  • Do the task. Have the learners do it so they can get the initial hands-on experience and you can observe and give them the feedback to make sure they’re doing it right.
  • Practice the tasks. In the real work environment they may get limited touches on specific tasks. The learning environment is controlled so you can have them practice a lot more than normal to gain mastery. I like to let them practice on their own without a lot of oversight (assuming you provided appropriate feedback in the “Do” stage).
  • Review the practice activities and debrief. What did they learn? How comfortable are they doing them? Are they able to accomplish the learning objectives? What are the next steps?

Articulate Rapid E-Learning Blog - tell, show, do, practice, review for effective online training

I like this technique better than the first one because it includes the review and debriefing. This is also a great way to structure a peer coaching process when mentors or peer coaches do a lot of the training. It gets them to do more than just show how something is to be done.

Build Effective Online Training by Starting with an Activity

Instead of building context and showing them what to do, have them start by doing an activity first. I call it the HAT technique (because I needed three bullets).

  • Hands-on activity: Start with an activity. This gets them engaged and thinking through the instruction. They can play and test things out. It’s also a way for those more experienced to go through the training at a different pace than those less experienced.
  • Advice: You can provide feedback or advice during the activity as part of a guided process, or you can wait until they’re done to debrief what they did and learned. This helps fill any gaps and answer questions exposed during the activity.
  • Tell: Once they complete the activity and debrief you can build additional context with more detail.

Articulate Rapid E-Learning Blog - hands on, advice, tell for effective online training

This technique is effective and starts by engaging the learner. However one of the challenges with this approach is that it requires more time to think through and build effective learning activities. On top of that, many clients demand a more linear solution like the common Tell, Show, and Do technique. But by doing the activity first you get people engaged and constructing their own understanding sooner. It also helps them identify their own knowledge gaps which helps build context for the instruction you want to provide.

Regardless of the technique you use, the key is to get them doing something to practice and demonstrate what they know. This will help you move past the linear information sharing and towards more effective online training.

Events

Free E-Learning Resources

Want to learn more? Check out these articles and free resources in the community.

Here’s a great job board for e-learning, instructional design, and training jobs

Participate in the weekly e-learning challenges to sharpen your skills

Get your free PowerPoint templates and free graphics & stock images.

Lots of cool e-learning examples to check out and find inspiration.

Getting Started? This e-learning 101 series and the free e-books will help.


Articulate Rapid E-Learning Blog - how to create illustrated characters in PowerPoint

PowerPoint is a versatile application. You can use it for all sorts of things from presentations to online training programs. In previous posts I’ve shown you how to customize clip art and create your own graphics.

Today’s tip comes courtesy of blog reader, Daniel Albarrán. He sent me an email stating that once he understood the versatility of PowerPoint it opened his eyes to all sorts of possibilities—one of them being the ability to create illustrated characters.

How to Create Illustrated Characters in PowerPoint

Here are some of the graphics he created in PowerPoint.

Articulate Rapid E-Learning Blog - examples of illustrated characters created in PowerPoint

Articulate Rapid E-Learning Blog - more examples of illustrated characters created in PowerPoint

As you can see, PowerPoint’s a capable application. Pretty cool, huh?

Tips When Creating Illustrated Characters in PowerPoint

Want to create your own illustrated characters? I created a couple of more tutorials with a few extra tips to add to what Daniel started. You can view the tutorials below.

Part 1: Working with PowerPoint’s curve shape.

Click here to watch the PowerPoint tutorial.

Part 2: Working with the custom shapes.

Click here to watch the PowerPoint tutorial.

Here’s a roundup of the PowerPoint tips:

  • Practice using the Curve tool so that you can control the curve and not create too many points. The fewer the points, the easier it is to edit.
  • Edit the shape. Right click on the shape to access the Edit Points feature. From there you can move the points and make adjustments and small tweaks.
  • Show & hide shapes using the Selection Pane.
  • Name the shapes in the Selection Pane for easier management of the image.
  • Use the Shape Union feature to merge the shapes. You can also group them if you want editing control in the future.
  • Right click to save the image. Select .png format to retain the transparency.
  • Don’t worry about being perfect. Also, the less detail the easier it is.
  • Practice, practice, practice. Once you get the hang of it, you’ll never want for the right image. Play around with the gradients and layered objects to create more texture and richness.

Articulate Rapid E-Learning Blog - an illustrated character created in PowerPoint

Here’s the character I created for the tutorials and the one Daniel shared with me. Feel free to look at how they were created.

Now it’s up to you. Do a practice character and see how it goes.

Events

Free E-Learning Resources

Want to learn more? Check out these articles and free resources in the community.

Here’s a great job board for e-learning, instructional design, and training jobs

Participate in the weekly e-learning challenges to sharpen your skills

Get your free PowerPoint templates and free graphics & stock images.

Lots of cool e-learning examples to check out and find inspiration.

Getting Started? This e-learning 101 series and the free e-books will help.