The Rapid Elearning Blog

Archive for December, 2013


Articulate Rapid E-Learning Blog - free templates

I received quite a few emails last week about the iPad-inspired template in the post on how to get rid of bullet points. Here’s a link to one I did in for a previous post. I updated the template to give it a different look.

Free E-Learning Template

I opted for a flat design with larger boxes to replace the bullet points. They’ll work better on a touch device. For the demo I used the icons made available by the designers at Icons8.

Articulate Rapid E-Learning Blog - tablet PowerPoint template design

See the template in action.

In addition to the free template above, the community team shared a number of free resources this past week.

Events

Free E-Learning Resources

Want to learn more? Check out these articles and free resources in the community.

Here’s a great job board for e-learning, instructional design, and training jobs

Participate in the weekly e-learning challenges to sharpen your skills

Get your free PowerPoint templates and free graphics & stock images.

Lots of cool e-learning examples to check out and find inspiration.

Getting Started? This e-learning 101 series and the free e-books will help.


Articulate Rapid E-Learning Blog - protect yourself from bullet points

I’m not sure if you’re aware of this, but bullet points get a lot of bad press. Apparently they contribute to bad courses. Although, I’m not sure they do. I tend to think that poor instructional design leads to bad courses.

There’s a place where bullet points make sense. They help break up information and make it easier to digest. However, we do have a tendency to over inform and thus the complaints about bullet points.

Here are a few tips on how to disguise bullet points. So that you get the value of the bullet point without all of the belly aching.

Convert each bullet point to an individual slide.

Does it matter if you have five bullet points on one screen or five screens with one point each? By breaking the points into separate screens you can focus on a single idea rather than multiple ideas on one screen. This eases cognitive load and can help the learner recall more.

Convert bullet point into labeled graphics.

Find an image appropriate to your content and then instead of bullet points, use labels to present the information. Find a descriptive single word title for the label and then add the bullet point information inside the label when active.

In this example I used the labeled graphic interaction in Engage. Because it’s a form-based authoring tool it’s easy to build yet offers a much more dynamic media experience.

Articulate Rapid E-Learning Blog - convert bullet points to interactive labels

Click here to view the labeled graphic.

In fact, you really could convert each bullet point to almost any of the interactions. Here’s an idea that’s a bit novel. Instead of using bullet points use characters and the conversation interaction. 

Articulate Rapid E-Learning Blog - convert bullet points to engaging elearning

Click here to view the conversation interaction.

Keep in mind that it’s best to keep these ideas in context to the course objectives. The wrong information doesn’t become better because it’s interactive or novel.

Convert bullet points to interactive video labels.

This is one of my favorite techniques and works great for procedures or content appropriate to videos. Here’s an example from a previous post on how to create interactive videos.

Articulate Rapid E-Learning Blog - convert bullet points to interactive videos

Click here to view the demo.

What I like about this approach is the learner can watch the video, but if at certain points needs more information, she can click on one of the labels (which essentially is the bullet point content). This could even be used to enhance those standard talking head videos where the label bullets augment the lecture.

Convert bullet points to icons or thumbnail images.

Replace the bullet point text with an icon or image that represents the bullet point content. This type of visual connection to content is what makes sites like Pinterest popular. How interesting would the same pages be if they were just lists of links?

Articulate Rapid E-Learning Blog - convert bullet points to graphics and thumbnail images

Below are a couple of ways to enhance the conversion of bullet points to graphics. Place the graphics in a context that is more aesthetically engaging.

Interactive bookshelf. Each shelf could represent the slide; and each book icon a bullet point. If you like the bookshelf idea, you can download the free template from the links below.

Articulate Rapid E-Learning Blog - convert bullet points to interactive bookshelf

Click here to view the interactive bookshelf.

Mimic a mobile tablet interface. This is similar to the bookshelf idea, except the bottom shelf could represent each slide. And the icons are the bullet points. Click an icon and open an area to add more content.

Articulate Rapid E-Learning Blog - convert bullet points to tablet-like interface

Click here to view the mobile interface demo.

Bullet points aren’t necessarily bad but because there is a lot of negativity around them, it’s a good idea to find other ways to share the same information. How else can you convert the bullet points?

Events

Free E-Learning Resources

Want to learn more? Check out these articles and free resources in the community.

Here’s a great job board for e-learning, instructional design, and training jobs

Participate in the weekly e-learning challenges to sharpen your skills

Get your free PowerPoint templates and free graphics & stock images.

Lots of cool e-learning examples to check out and find inspiration.

Getting Started? This e-learning 101 series and the free e-books will help.


Articulate Rapid E-Learning Blog - free textures

Do a search and you’ll find all sorts of free textures to use with your online training courses. In a recent post I also shared how to get hundreds of free textures. The trick is learning to use those free resources so they make sense. And that’s what we’ll look at today—how to use the free textures to build better courses.

Use the Free Texture as a Background

The slide background is the single largest graphic in your course. The background image can turn what is a bland screen into something that is visually rich and interesting. It also adds some context and allows you to create a visual connection to the elearning course content. This is something I covered in the blog post on doing a background check your next elearning course.

Sometimes you can find one image that is perfect. If so, that will save a lot of time in your production. In the case of a single texture, there may be one that works for your course context. For example, a few months back I built a demo for the blog post on different ways to state course objectives. In that one, I used a concrete texture for the background because it fit well with the earthquake theme especially since the concrete was cracked.

Articulate Rapid E-Learning Blog - example of an elearning course using textures as a background image

Click here to view the demo.

Play around with the textures to get unique looks. For example, an easy solution is to add a blur effect to the texture which detracts from the background and allows you to draw the person’s focus to specific objects on the screen. Thus when you add content on top of the texture, you get an image that is visually rich but not distracting.

Fill Shapes with Free Textures

Another way to get more value out of the free textures is to fill shapes with them. Usually when adding shapes to the screens we tend to stick with the defaults which are fill colors or gradients. What happens is that all of our courses have the same look.

Why not fill the shapes with textures rather than colors? That really opens the doors to all sorts of options. For example, you can scale the texture or tile it. When you compress the shape, the texture compress as well and that can create a distinct look.

Articulate Rapid E-Learning Blog - create buttons using free textures

Working from the same idea, I’ll use a color picker to pick a color from the texture and use that as a background. Then I’ll add buttons to screen and fill the buttons with the texture, or vice versa.

Articulate Rapid E-Learning Blog - example of a shape filled with a free texture

Here’s a simple example from a previous blog post, where elearning super hero Stephanie Harnett took a simple notebook template that I shared in a blog post and added textures to give it a richer look. As you can see, filling the shapes with textures transforms the default look into something that looks more custom and polished.


Click here to view the tutorial.

Customize Clip Art with the Free Textures

Another way to use the free textures is by customizing clip art. I’ve shared plenty of tips in the past on how to ungroup clip art and make custom modifications. One option is to either fill the clip art shape with a texture or use the layering effect I shared above.

In the image below you can see a simple example of a modified clip art image. In that image I softened the walls with a texture. The desk is made of layered wood. I added a linen layer to his suit and the chair padding is filled with a cloth texture.

Articulate Rapid E-Learning Blog - free textures combined with free clip art

If you’re stuck working with clip art, these types of modifications can help turn them into something unique.

Layer Textures Over Shapes

Sometimes the textures are too bold or strong. Or they may not fit with the colors of your shapes. In those cases you can layer the texture over an existing shape.

Articulate Rapid E-Learning Blog - use layers to create custom images in PowerPoint

Here’s how:

  • Create the shape and fill it with a color.
  • Duplicate the shape and fill it with the texture.
  • Place the textured shape over the colored shape. Then change the transparency of the textured shape to let the colored shape peek through.
  • Group the shapes so they’re a single object. Or save the grouped shape as an image.

This technique is a great way to create custom images and soften up the texture.

There are plenty of free textures to find online. The key is figuring out how to use them when building your online training programs. Hopefully these tips will help you get more value out of the free textures you find. Do you have any tips to add?

Events

Free E-Learning Resources

Want to learn more? Check out these articles and free resources in the community.

Here’s a great job board for e-learning, instructional design, and training jobs

Participate in the weekly e-learning challenges to sharpen your skills

Get your free PowerPoint templates and free graphics & stock images.

Lots of cool e-learning examples to check out and find inspiration.

Getting Started? This e-learning 101 series and the free e-books will help.


Articulate Rapid E-Learning Blog - more than a dozen bonus tips & tricks to build better elearning

Whenever I do a workshop some extra things come to mind which has me throw in a number of “bonus tips.” At a recent workshop someone told me that I have so many bonus tips that I should do a workshop on my bonus tips.

So today I am sharing a few “bonus” tips based on recent questions and interactions with the blog readers.

Articulate Rapid E-Learning Blog - how to search the internet

“Hey, how’d you search that site so fast?”

Well, there’s this company, Google, you may not have heard of them but they do a great job with search. Most of us tend to open a Google page and do a general search.

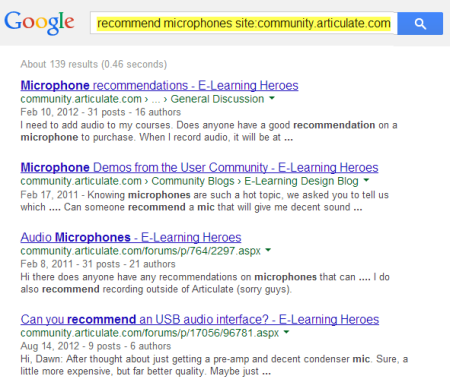
But there are more efficient ways to search. For example, it’s easy to limit a search to a specific domain. All you have to do is type in your search term and include site: with the domain you want to search.

Let’s say you wanted to search for some microphone recommendations in the Articulate community. It would look like this: recommend microphones site:community.articulate.com

Articulate Rapid E-Learning Blog - google search results for domain

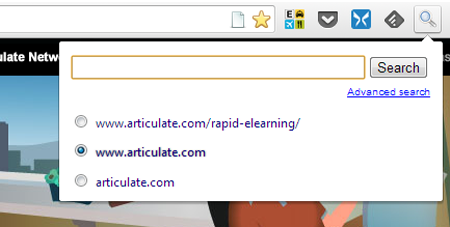
Of course, I don’t really search that way since I discovered the Search the Current Site extension for Chrome. Here’s the link for Firefox.

This is a tool I use every day because it lets me search sites without typing in the extra info. As you can see in the image below, I can search just through my blog or the entire Articulate.com domain.

Articulate Rapid E-Learning Blog - search for elearning tips

Bonus tip: If you’re looking for microphone recommendations, I’ve had good success with the Samson mics. I use a C03U in my home office and Go Mic when I travel. I also like the Snowball from Blue Microphones. All are good choices for simple recording and they’re relatively inexpensive.

Articulate Rapid E-Learning Blog - free elearning template that is flat UI desktop

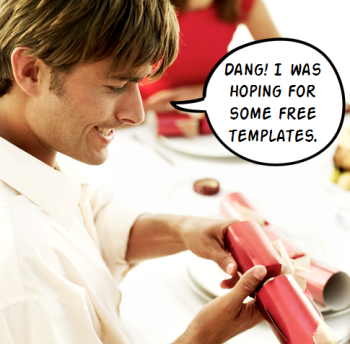
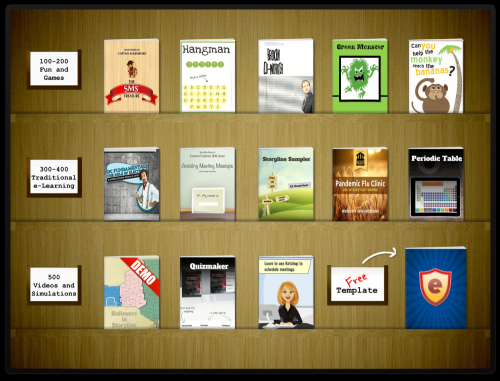
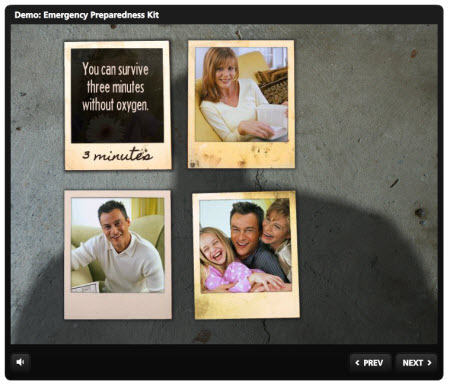
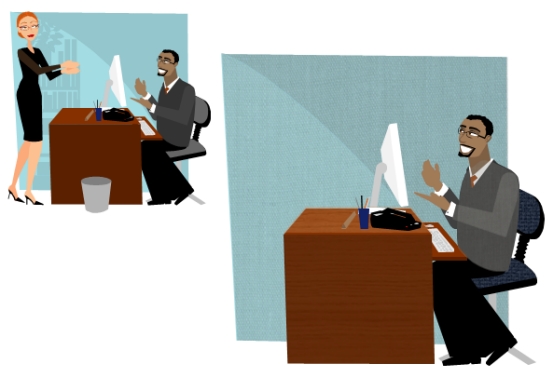
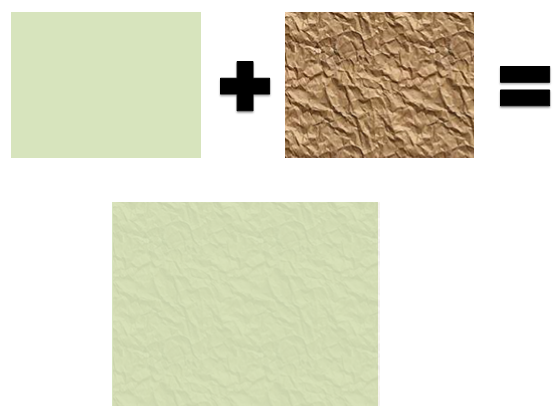
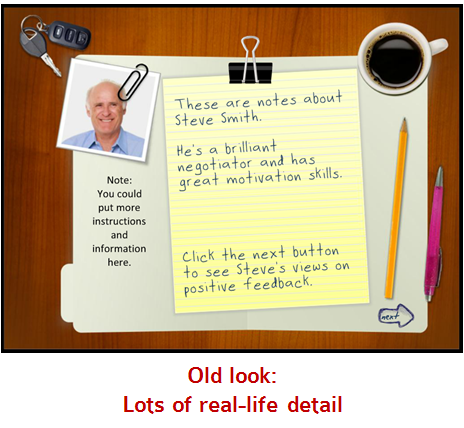
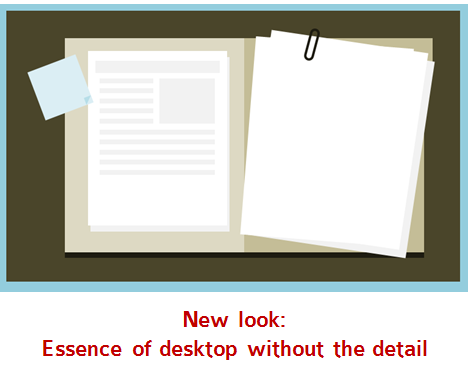
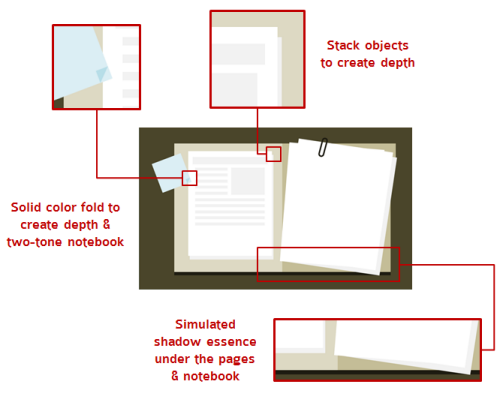
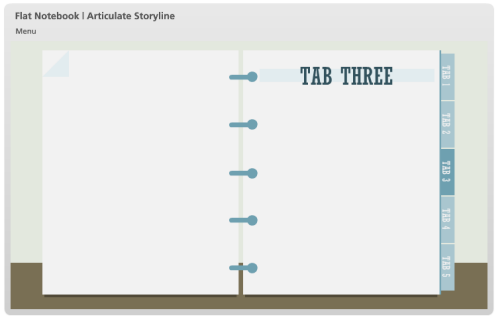
In a recent post I shared some ideas on how to do a course makeover on older courses. In that post I shared a free elearning template based on the interactive notebook tabs. I also shared a makeover of the overhead desktop. But that was only an image and not a template.

Articulate Rapid E-Learning Blog - example of flat UI free template in PowerPoint

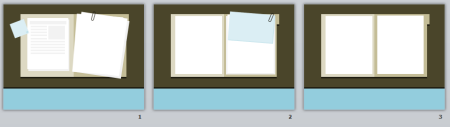
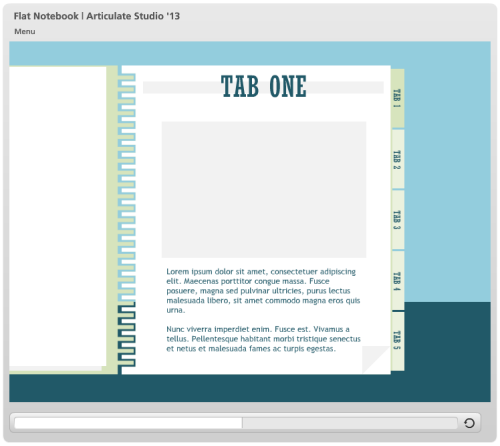
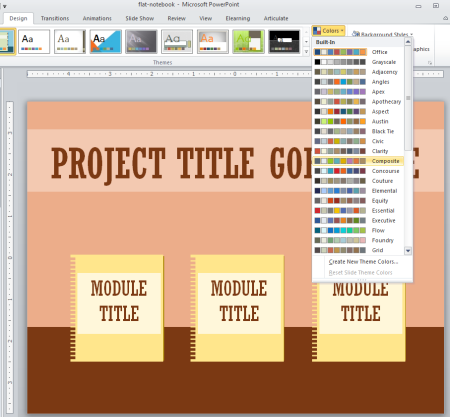
A lot of people asked about the image and requested a template version of the flat desktop so here it is, just for you. Below is a quick published version if you want to see it in action.

Articulate Rapid E-Learning Blog - example of a flat UI interactive elearning course

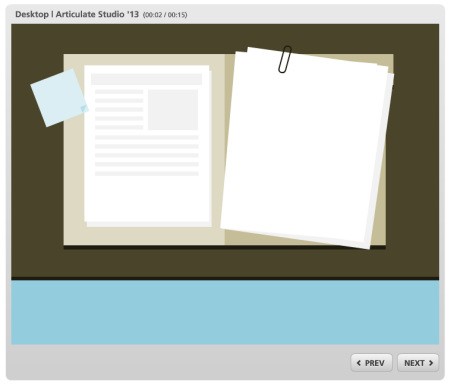
Click here to see the desktop template in action.

Articulate Rapid E-Learning Blog - how to become an instructional designer

“If I can only read one book to learn more about building better courses, what would it be?”

There are a lot of really good elearning books out there. We started a list of books in the community where you can find more titles.

From my experience, many of the people doing this stuff are relatively new and don’t have very deep technical skills. So in that sense, learning to use the software better is always going to help.

Articulate Rapid E-Learning Blog - design for how people learn

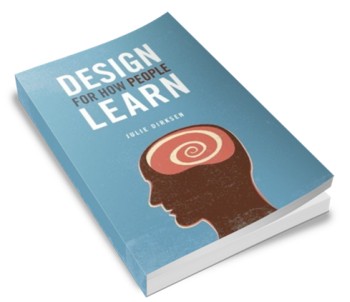
However, if I was forced to pick a single book, it would be Design for How People Learn. I recommend this one all the time. It’s an easy read and Julie Dirksen does a great job helping people think through the learning process. If you’re just getting started and need to think like an instructional designer, this book will help you learn about learning.

Bonus tip: With the release of Articulate Replay, I’m anticipating that I’ll do more tutorials with my webcam. Not only is this good motivation to lose weight (and shave and move beyond old t-shirts and sweats) it has me thinking about how to set up my home office for video.

David shared this set up which includes a simple light kit, backdrop stand, and material for green screen. I recall my first low-end light kit a few years ago was close to $1000. Mike also shared a great way to get better webcam lighting for $15. Wistia also has some great tips on a DIY video studio. Is that a bonus, bonus tip?

The product links to Amazon may produce a slight commission.

Articulate Rapid E-Learning Blog - internet tip when using Google Chrome

I was showing someone my Springpad notebooks and someone asked why the web site I was using didn’t look like a browser window.

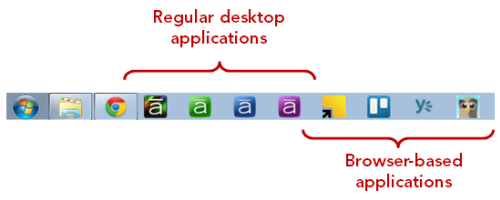
The community team at Articulate uses a lot of browser-based applications like Trello and Yammer. Instead of having to access them via the browser I set them up so they work like single applications.

Articulate Rapid E-Learning Blog - google chrome versus save as application

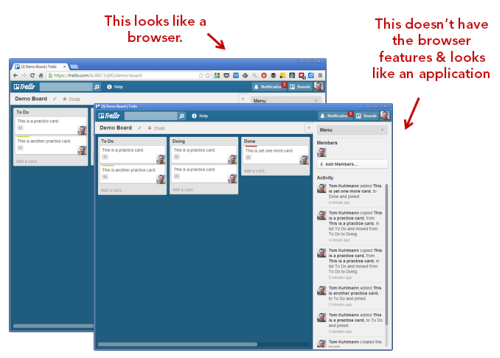
Look at the image above. Notice that the browser features are gone? And since it’s treated like an application I can add it to my tool bar for quick access.

Articulate Rapid E-Learning Blog - toolbar with google chrome applications

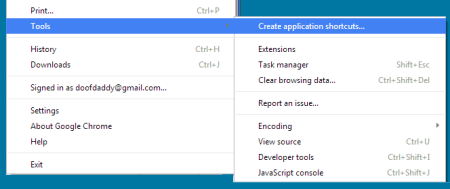
I use Chrome. If you do, too, this is how to create the application from the website. Go to Tools and select Create Shortcut Application. Then decide where you want to put it. As I said earlier, I like the quick access to the applications without all of the clutter I normally have in my browser.

Articulate Rapid E-Learning Blog - how to create application shortcuts in Google chrome

Bonus tip: Trello is a cool application for simple project management. My team uses it daily. If you’re looking for a solution, give it a try. Mike even featured Trello in his quick Replay demo so you get a peek at how it looks.

So there you go, a smorgasbord of bonus tips & tricks to help in your course design. Do you have any bonus tips to share?

Events

Free E-Learning Resources

Want to learn more? Check out these articles and free resources in the community.

Here’s a great job board for e-learning, instructional design, and training jobs

Participate in the weekly e-learning challenges to sharpen your skills

Get your free PowerPoint templates and free graphics & stock images.

Lots of cool e-learning examples to check out and find inspiration.

Getting Started? This e-learning 101 series and the free e-books will help.


Articulate Rapid E-Learning Blog - create a new look for your training courses

Graphic styles change. What was hot one day, starts to look old the next. One way to make your courses look fresh is by adapting to the changing styles. The past few years we’ve seen a shift from bevels to glossy gel to reflections. Now the hot design look is flat UI (user interface).

Just the other day someone asked me for feedback on a course they wanted to makeover. I recommended that they try and convert it to a flat design. It wouldn’t take much time to do so, and in a short time you’ve got a whole new look.

What is Flat Design?

Do a search and you’ll find all sorts of resources online concerning flat UI design, but here’s my basic overview:

  • Simplicity. The goal is to have a simple design that is clean. For example, instead of creating an overhead desktop that looks real, create one that has the essence of the desktop with less distracting detail.

Articulate Rapid E-Learning Blog - overhead desktop template

Articulate Rapid E-Learning Blog - flat UI desktop template

  • Consistency. What generally works with flat design is to stick with similar line styles. Choose straight or round. But don’t mix them. Or when you do, use it for effect. For example, use a circle on a screen with all straight lines to create contrast. And that contrast is a great way to draw the learner’s attention to a specific place on the screen. Also, if you go with rounded corners, make sure the rounded elements are the same.
  • Limited depth. The one thing you see with a lot of flat design is that there are rarely any drop shadows. And when they do exist, they’re simple. Depth is created by stacking objects or with solid color drop shadows.

Articulate Rapid E-Learning Blog - what is flat UI

  • Simple colors. Select a solid color scheme. If you do a search for flat design color schemes you’ll notice that they tend to be bold but a bit muted. Here’s a good starting point to find some colors. An easy way to get a muted look is to add a semi-transparent white shape over the colored shape.

fArticulate Rapid E-Learning Blog - flat UI color scheme

  • Lots of white space. White space is great for learning design. It forces us as designers to get rid of content. Since we have less space, we need to make sure that the information we put into it is clear and contributes the message we want to convey.

Free E-Learning Template: Interactive Tabbed Notebook

To put my own thoughts into practice I did a makeover of an existing PowerPoint template that’s available as a free download in the elearning community. The original tabbed notebook was part of a workshop I did on creating interactive elements for rapid elearning design.

Articulate Rapid E-Learning Blog - example of tabbed template

Click here to view the elearning example.

As you can see, the original design is simple and a bit dated. Below is the new design with an updated flat UI look.

Articulate Rapid E-Learning Blog - free flat UI elearning template in PowerPoint

Click here to view the elearning example.

How to Create the Flat UI Template

Here are some of the decisions I made converting the old template into an updated flat UI design.

  • Created a minimalist version of the notebook. I wanted the essence of a tabbed notebook with as little detail as possible. I decided to include a cover, tabs, and a simple spiral.
  • I played around with different ideas for the spiral. For the PowerPoint version I stuck with straight lines. I remade the template for Storyline and used the rounded shapes instead. Which spiral type do you like best?

Articulate Rapid E-Learning Blog - flat UI elearning template in Storyline

Click here to view the interactive Storyline version of the template.

  • To create depth without detail I added a corner on the page to imply a bend and I added a solid line under the main page to lift it a bit from the tabs.
  • All of the colors are built using the design schemes so you can easily swap out colors or add your own design colors.

Articulate Rapid E-Learning Blog - chnage color schemes with your free template

  • I stuck with a simple font pair, using Rockwell Condensed for the titles and Trebuchet MS for the body.

Download the Free Template

You can download the free templates below. I created one in PowerPoint to use with Articulate Studio and another to use with Storyline. You’re free to use them as you wish.

If you do a flat UI makeover of an older course, I’d love to see the results. In fact, David had a recent challenge asking for a flat UI design. You can show off your work in that forum thread.

Events

Free E-Learning Resources

Want to learn more? Check out these articles and free resources in the community.

Here’s a great job board for e-learning, instructional design, and training jobs

Participate in the weekly e-learning challenges to sharpen your skills

Get your free PowerPoint templates and free graphics & stock images.

Lots of cool e-learning examples to check out and find inspiration.

Getting Started? This e-learning 101 series and the free e-books will help.